
-
Learn the Basics
-
- Cards
- Card Icons
- Card Details
- Card Statuses
- Card Users
- Card Activity Stream
- Card Status Roles
- Dates in Cards
- Reminder
- Responsible Person
- Card Blockers
- Global Card Blockers
- Card Issues
- Adding Cards to My Space
- Hinzufügen von Karten zu "MySpace"
- Removing Cards from My Space
- Entfernen von Karten aus "MySpace"
-
- Creating Cards
- Changing Card Statuses
- Following Cards
- Scheduling Cards
- Renaming Cards
- Duplicating Cards
- Quick Actions
- Mass Actions
- Copy & Paste
- Creating Card Statuses
- Changing the Default Card Status
- Changing the Order of Card Statuses
- Deleting Card Statuses
- Moving Cards between Spaces
- Archiving Cards
- Unarchiving Cards
- Deleting Cards
- Creating Card Blockers
- Managing Card Blockers
-
- Documents in KanBo
- Card Documents
- Uploading or Creating Documents in Cards
- Attaching and Detaching Documents in Cards
- Space Documents
- Document References
- Document Sources
- Downloading Documents
- Editing Documents
- Editing Documents in Browser
- Editing Documents in Office Applications
- Renaming Documents
- Deleting Documents
-
Visualize Work
-
- Space Views
- Creating Space Views
- Personal and Shared Space Views
- Card Grouping
- Filtering Cards
- Display Settings
- Work Progress Calculation
- Grouping Description
- Card Grouping Settings
- Changing the Order of Groupings
- Changing the Order of Space Views
- Deleting Space Views
- Following Card Statuses and Custom Fields
-
-
Collaborate
-
Level Up Your Work
-
Work Securely
-
Integrations
-
- Advanced KanBo Actions in Power Automate
- Creating KanBo Space Attached to Subfolder Created by Power Automate
- Creating Document Folders in Document Libraries Created by KanBo with Power Automate
- Exporting Space Views to Excel
- KanBo and Azure Logic Apps Integration
- Power Automate Integration: Triggers and Actions
- Seamless Import from Microsoft Planner to KanBo
- Synchronizing KanBo with Outlook Calendar
- Using KanBo Outlook App
-
Inviting External Users to KanBo (Office 365)
This post is also available in: Deutsch
Only the space owner can add external users to the space.
If your organization performs a type of work that involves sharing documents or collaborating directly with vendors, clients, or customers, then you might want to use the external sharing features of KanBo. It will create a possibility for you to share content with people outside your organization, who do not have licenses for your Microsoft Office 365 subscription.
Note that in this case a KanBo license is consumed for the guest user.
Prerequisites
To add external users, you must have the Adding Users role assigned.
You can invite external users from different companies that use Office 365 or users with Windows Live ID. If your user to be invited is using a non-Microsoft email, he needs to register it as a Live ID.
Sharing KanBo with the guest users
When you share a site with external users, you send them an invitation that they can use to log into your site. You can send these invitations to any email address with Microsoft Live ID. When the recipient accepts the invitation, they can log in using either a Microsoft account or a work or school account. When you share a site, you can select the type of permissions you want that person to have on the site.
Watch our guide or follow the instruction below
*Video guide was recorded on the older KanBo version, you may notice some visual changes.
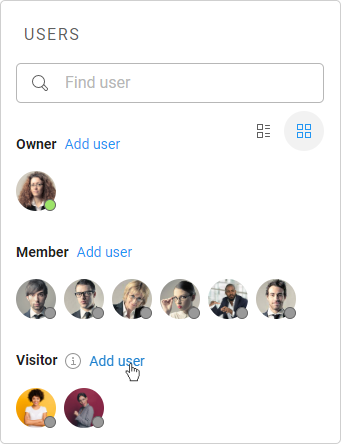
To invite external users to the KanBo space:
- Open the space.
- Select
 Users.

- Click Add user in the Visitors section.
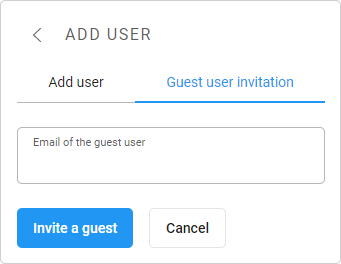
- Select Guest user invitation.
- Type an email of the guest and click Invite a guest.
Receiving an invitation to the KanBo space
You will receive an email with the invitation.
- Click on the Accept invitation button.
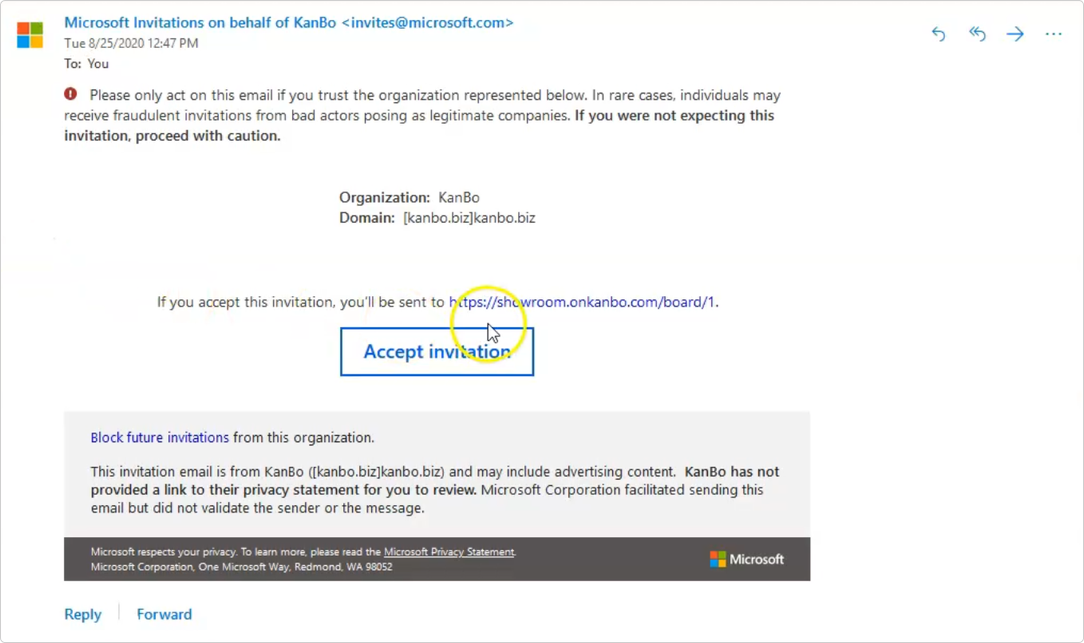
- Accept review permissions.
In a moment you will be redirected to KanBo.
Was this article helpful?
Please, contact us if you have any additional questions.