Send Email to KanBo – Installation (Cloud)
Table of Contents

1. Creating a Catch-All email address.
You will need to create a Catch-All email account in your Exchange Online.
- Create a new account for the Catch-All purpose only in Office 365 Admin Center. Give this account the Exchange Online license. Read more here about assigning Office 365 licenses to users here.
- Add accepted domain in your Office 365.
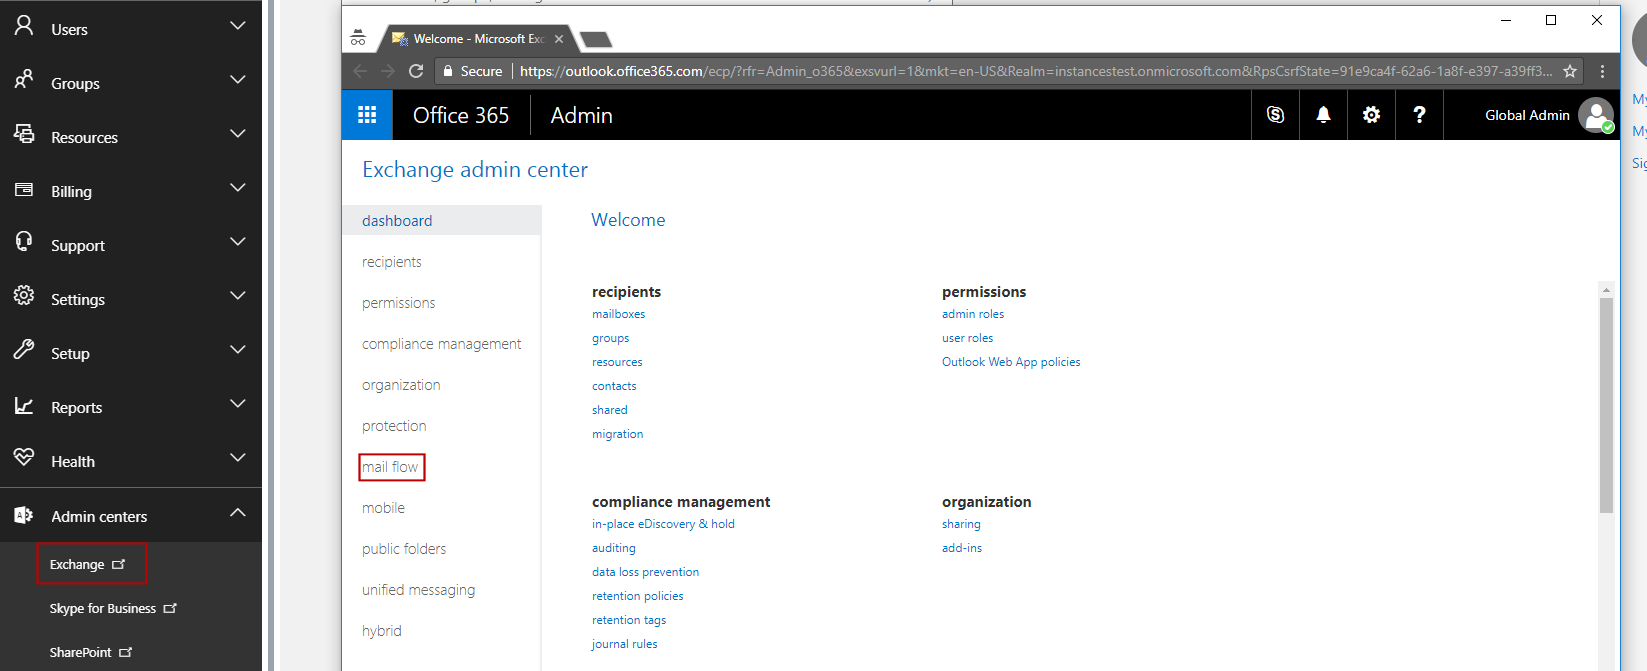
- Go to Office 365 and select Admin -> Exchange.
- As a next step, please choose the Email Flow in Exchange Admin Center.
- Click on the “Accepted Domains”, then select your domain and click on the edit button.
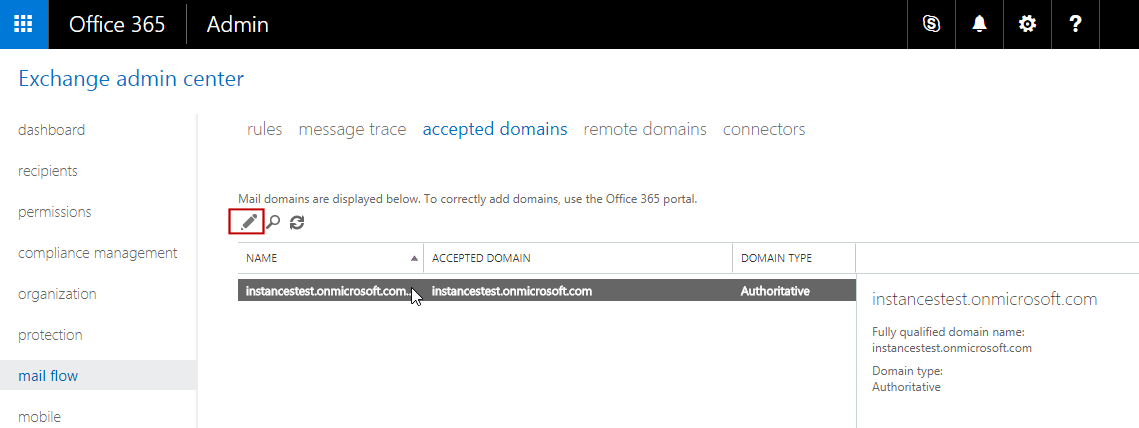
- In the new windows, change “Authoritative” to “Internal Relay” and save the changes.

- Open Mail Flow section once again. Now select the Rules section and click on + (Add New button) and chose Create New Rule.
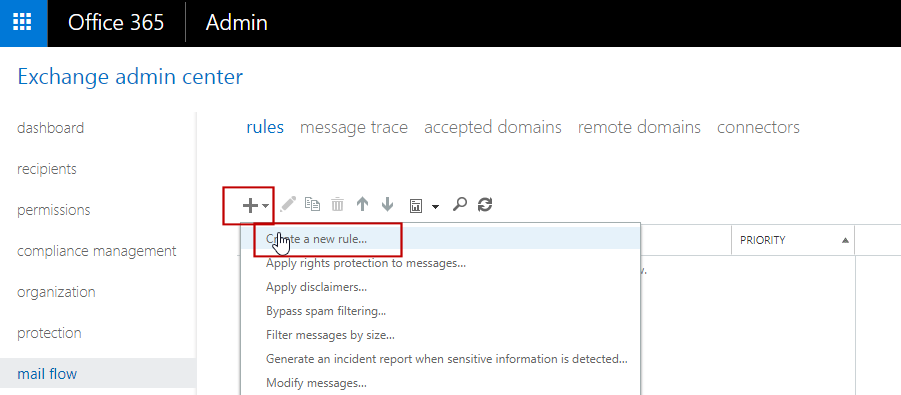
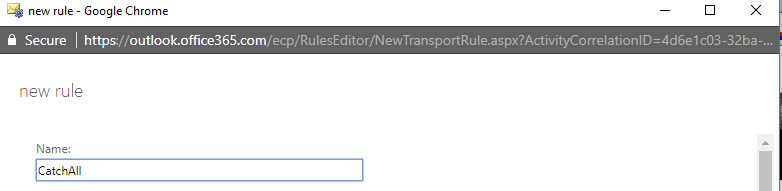
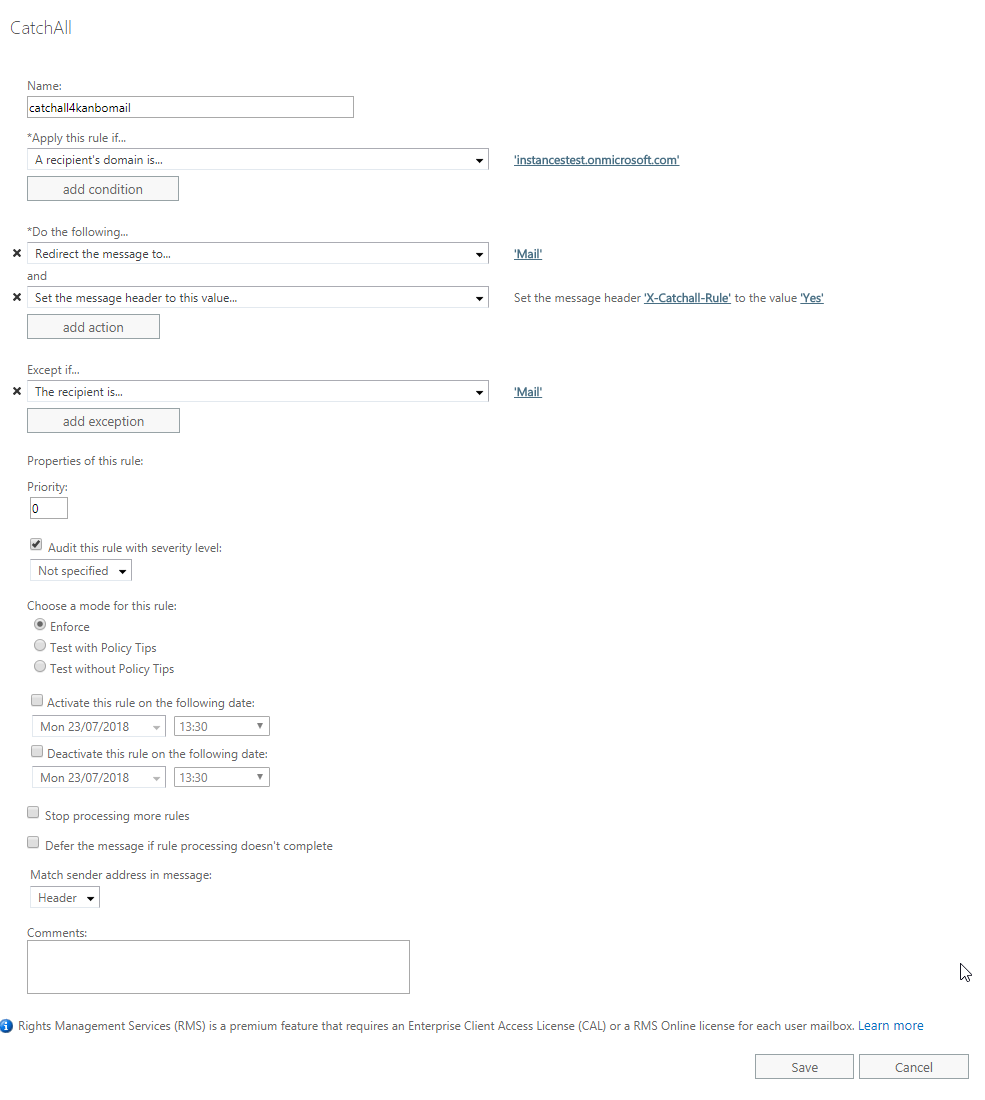
- When the rule appears, select "More options..." at the bottom of the page. Give this Rule a name like "CatchAll".
- Set the following properties to the Rule.
- In Apply this rule if chose "A recipient's domain is" - here add your domain.
- In Do the following chose "Redirect the message to" and then, chose your CatchAll Email account from the User Picker.
- In Do the following Add Action and select "Set the message header to this value..." and "Set the message header 'X-CatchAll-Rule' to value 'Yes'.
- In Except if... select "The recipient is..." and then, chose your CatchAll Email account from the User Picker.
- Now save the Rule.
2. Enabling Incoming Mails in the KanBo appsettings.json
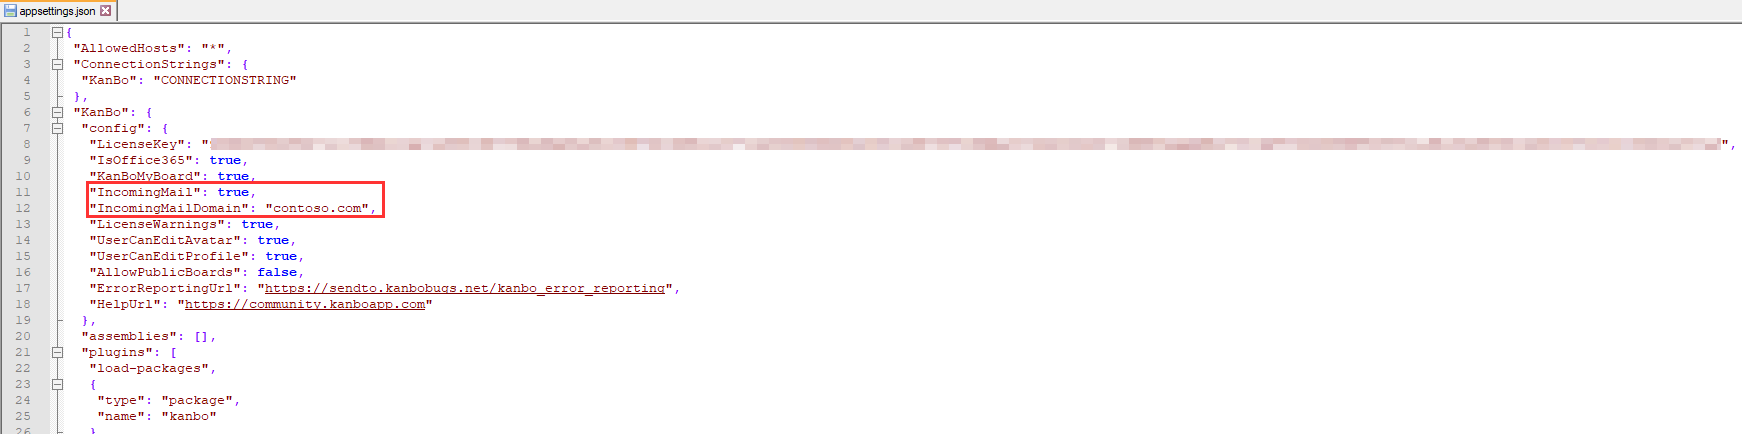
- Go to Your KanBo appsettings.json and set "KanBoIncomingMail" to "true".
"IncomingMail": true,
- Set KanBoIncomingMailDomain to your sending domain name - the one on which you have the Catch-All mailbox.
"IncomingMailDomain": "yourdomain",
- Save the appsettings.json
3. Azure AD permissions
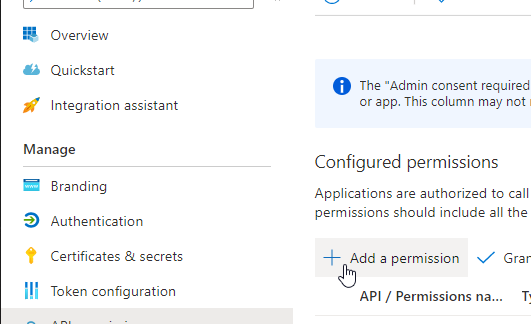
You need to make sure that all the required permissions are present in Azure AD.- Go to Azure AD and find Your KanBo registration.
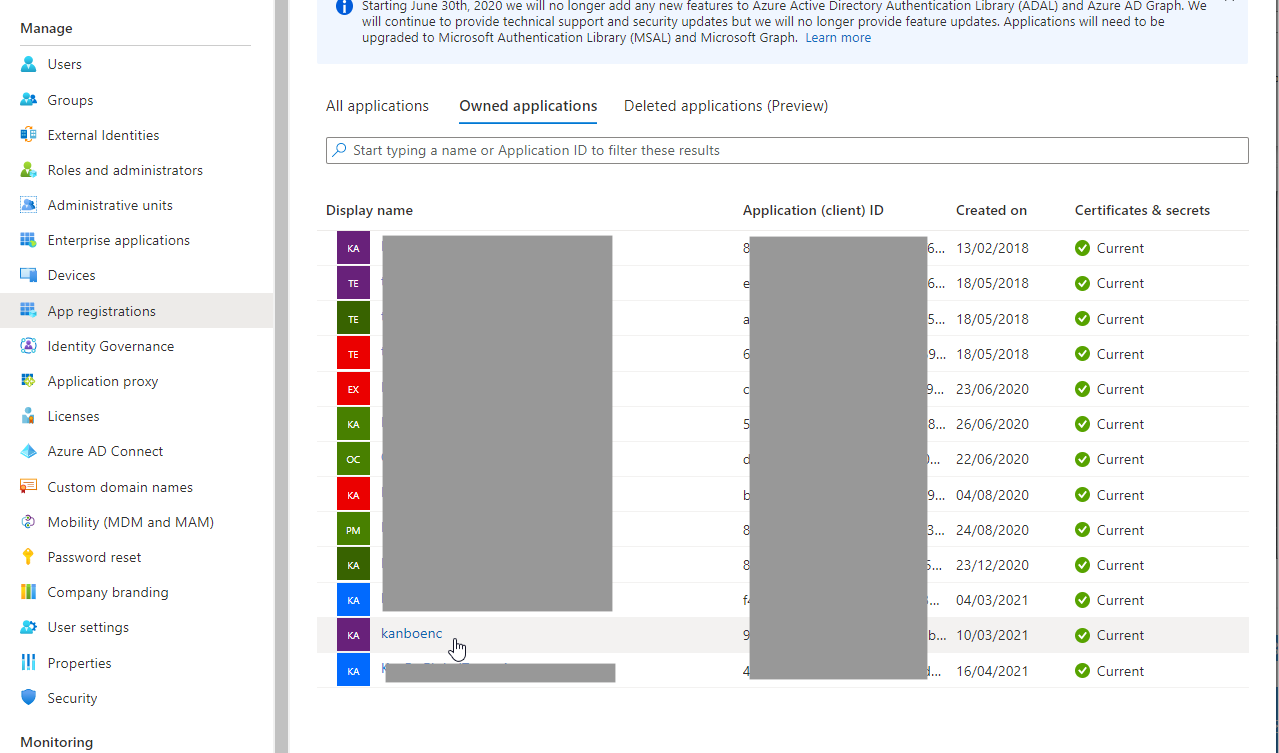
- Go to API Permissions and select Add a permission.
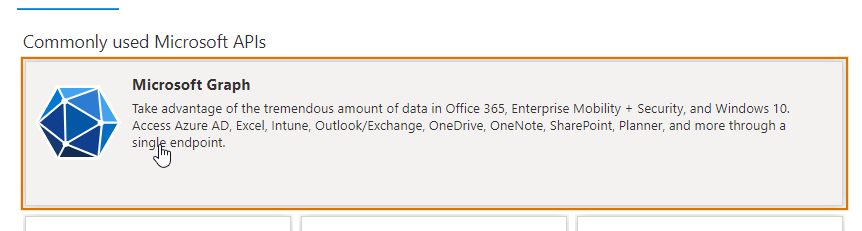
- Select Microsoft Graph.
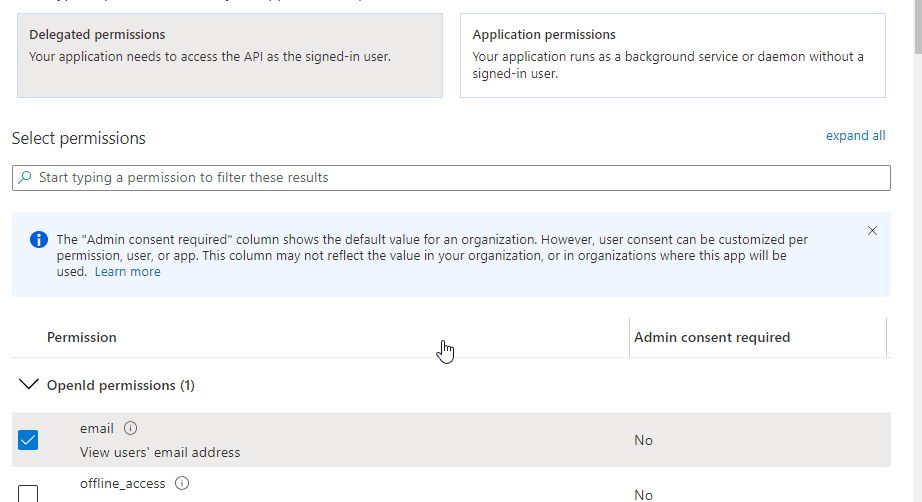
- Select Delegate and the following permisisons.
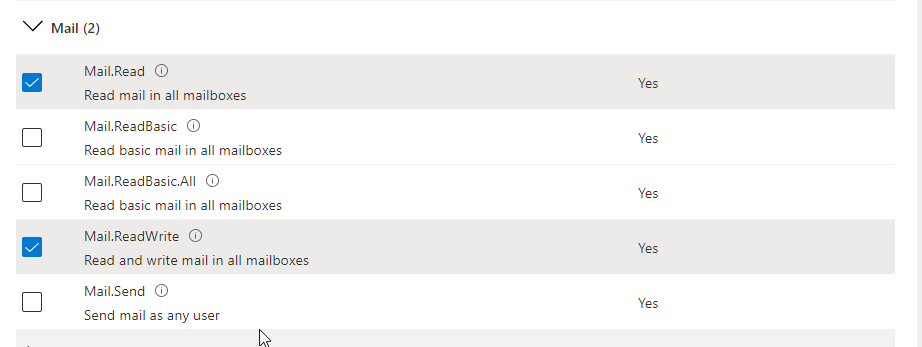
- OpenID permissions - Email
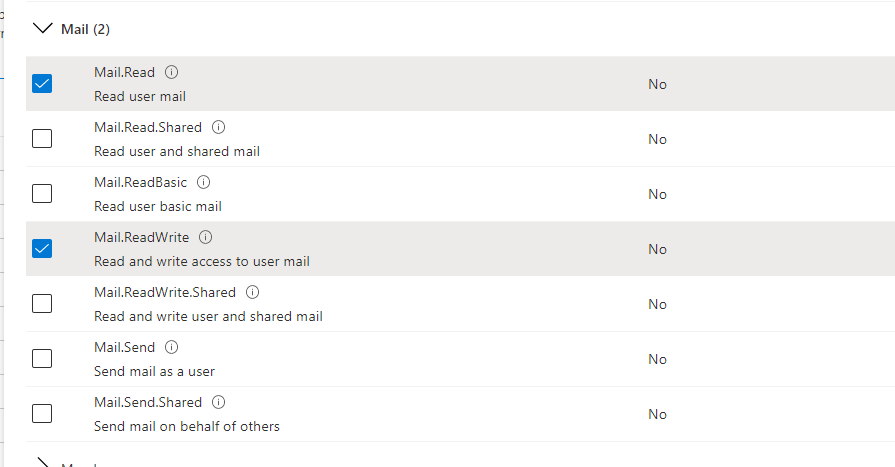
- Mail - Mail.Read and Mail.ReadWrite
- Save it. Follow the process, this time select Application permissions.
- Here add Mail - Mail.Read and Mail.ReadWrite
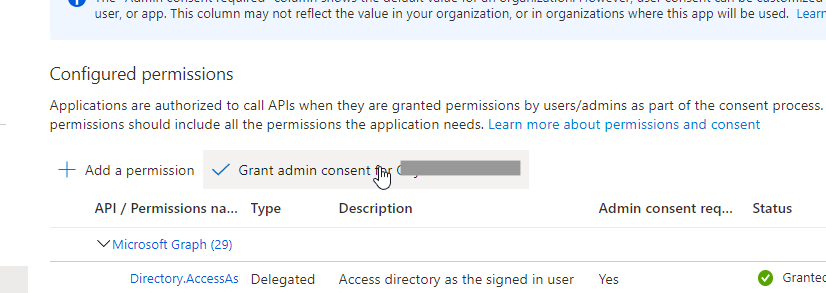
- Once added, grant Admin's consent.
5. Configure the Email Tool
- Contact us at support@kanboapp.com to receive the KanBo.JobHost.zip Package if You do not have it.
- Once you download the package, unzip it and move it a chosen location.
- Open your directory and start editing appsettings.json
- Change the beggining of the file (until "NLog") to this:
- Adjust the uppercased values according to the values in Your KanBo appsettings.json and the previous steps
- Save the changes.
{
 "AllowedHosts": "*",
 "ConnectionStrings": {
  "KanBo": "KANBOCONNECTIONSTRING"
 },
 "KanBo": {
  "config": {},
  "assemblies": [],
  "plugins": [
    "load-packages",
   {
    "type": "package",
    "name": "kanbo-api",
    "thumbprint": "KANBO-CERTIFICATE-THUMBPRINT",
    "url": "https://KANBOURL"
   },
   {
    "type": "package",
    "name": "auth-aad",
    "client-id": "KANBO-CLIENT-ID",
    "tenant": "KANBO-TENANT-ID",
    "thumbprint": "KANBO-CERTIFICATE-THUMBPRINT"
   },
   {
    "type": "job.incoming-mail",
    "incoming-mail-domain": "MAIL-DOMAIN",
    "children": [
     [
      "mailbox",
      {
       "type": "graph",
       "email": "USER@MAIL-DOMAIN"
      }
     ]
    ]
   }
  ]
 },
6. Add an Azure App Webjob
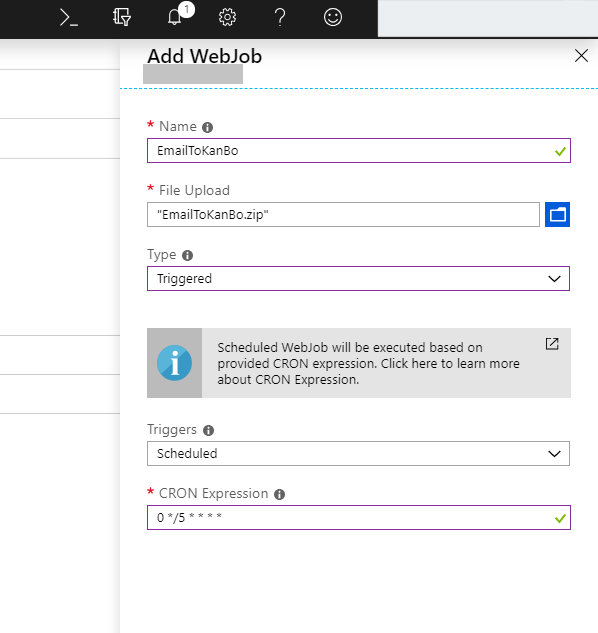
- Pack the EmailToKanBo folder in a .zip file (the package you were working on in the previous steps).
- Go to your Azure App -> Webjobs. Select +Add.

- Select:
- Name: yuour custom name
- File upload: the .zip of EmailToKanBo package, already configured,
- Type: Triggered,
- Triggers: Scheduled,
- CRON Expression: choose the convenient time for you, for information regarding CRON on Azure, see this guide.
7. Use it!
You finished the configuration and installation of the Incoming Mails feature. Now read how to use this feature by reading an article here: Incoming EmailsRecommendation: Set an Outlook retention policy to remove old messages
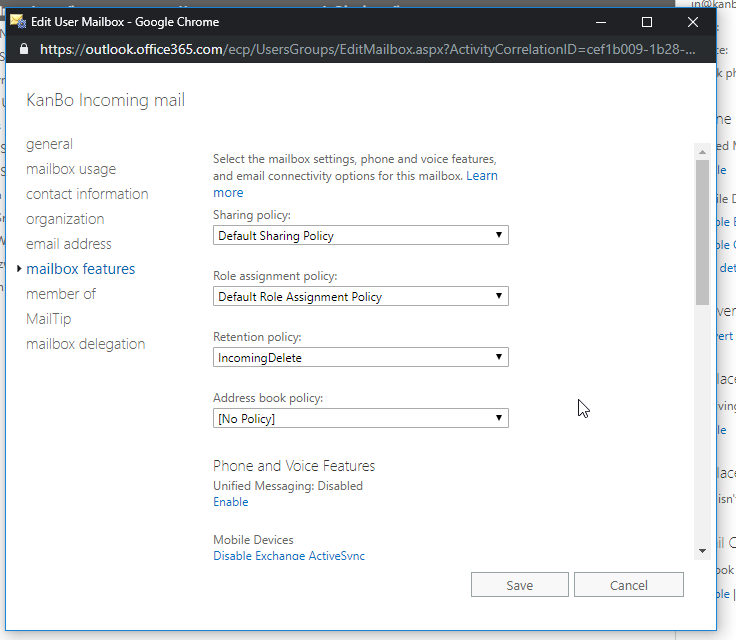
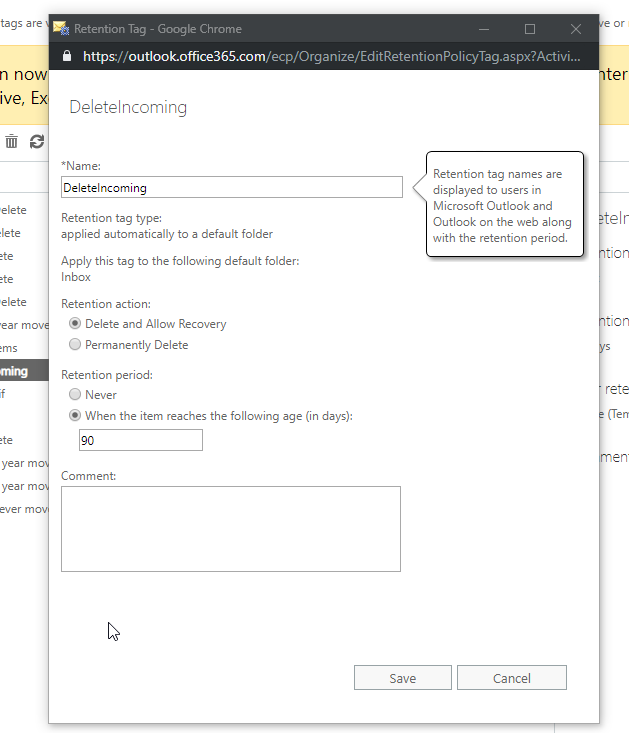
In order to not allow your Incoming Mails mailbox to clog up, set a simple rule to clean messages older than a week.
- As Exchange Administrator, got to Exchange Admin Center -> Compliance Management -> Retention Tags. Create a new rule "applied automatically to a default folder.
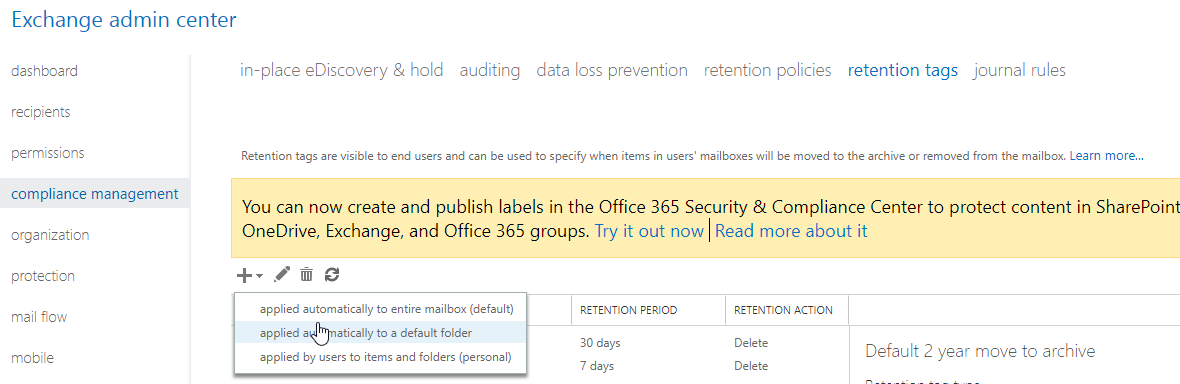
- Find out a name, select this tag to apply to Inbox only and choose retention period to 90 days.
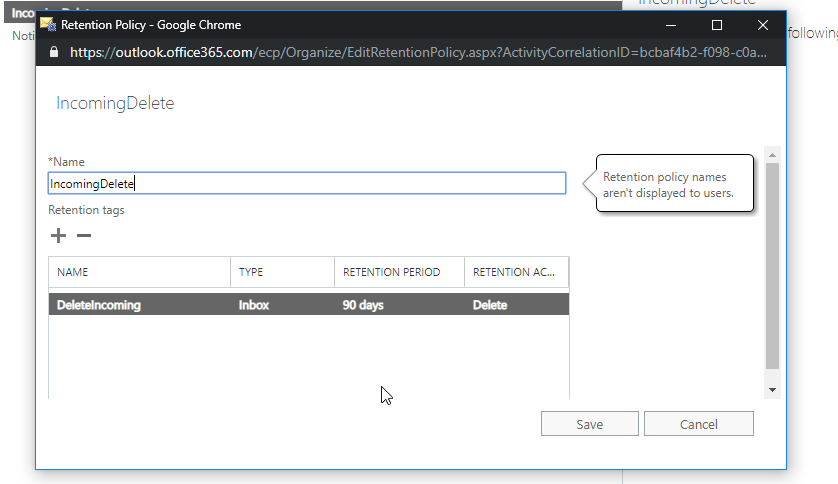
- Go to retention policies and create a new Retention policy with this retention tag assigned.
- Go to recipients, select your Incoming Mails account and then in Mailbox features select your newly created Retention Policy.