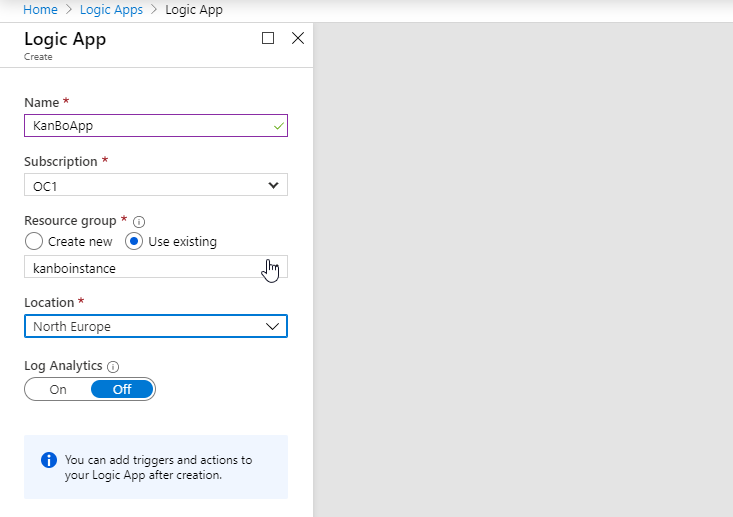
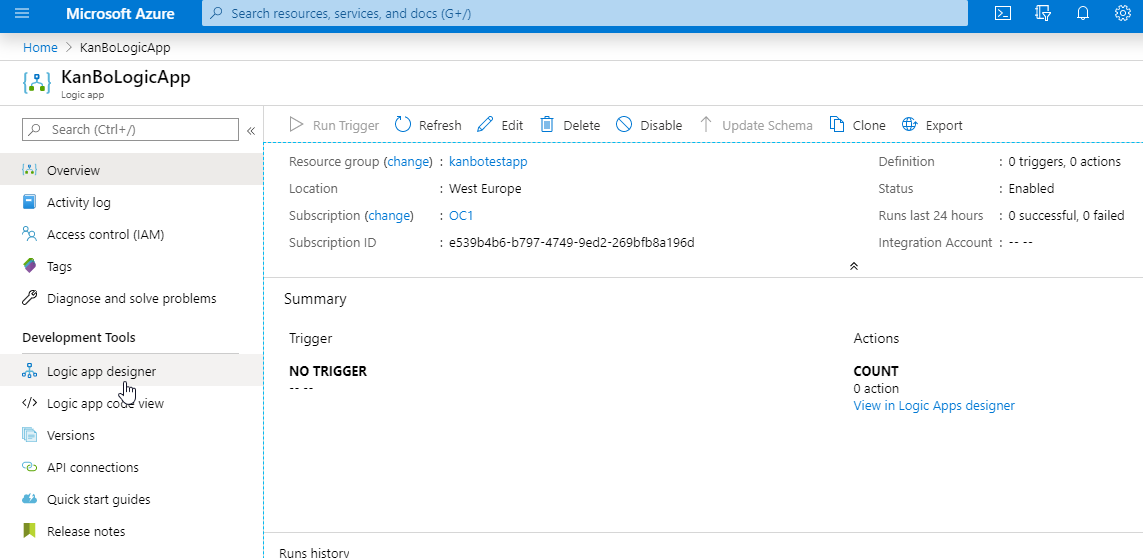
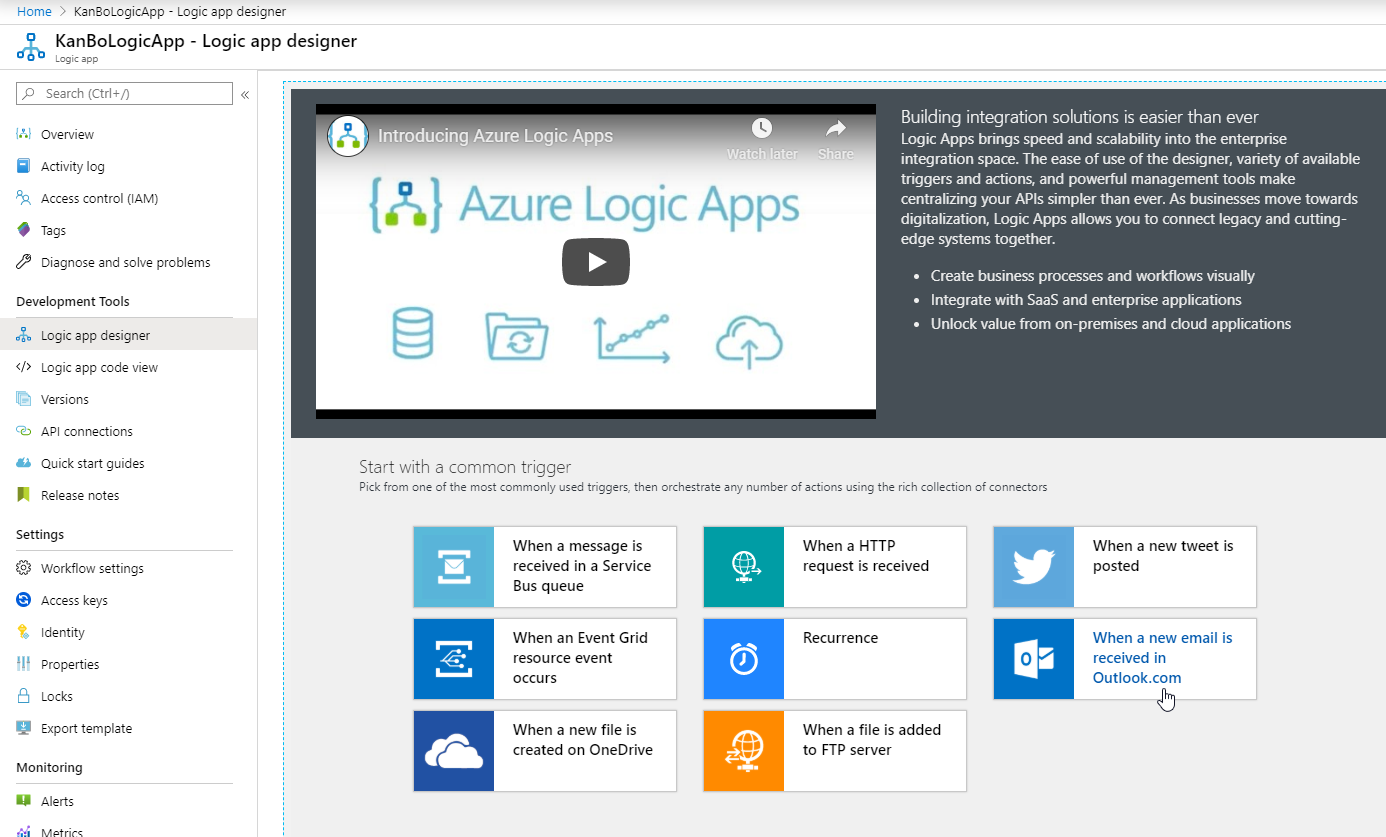
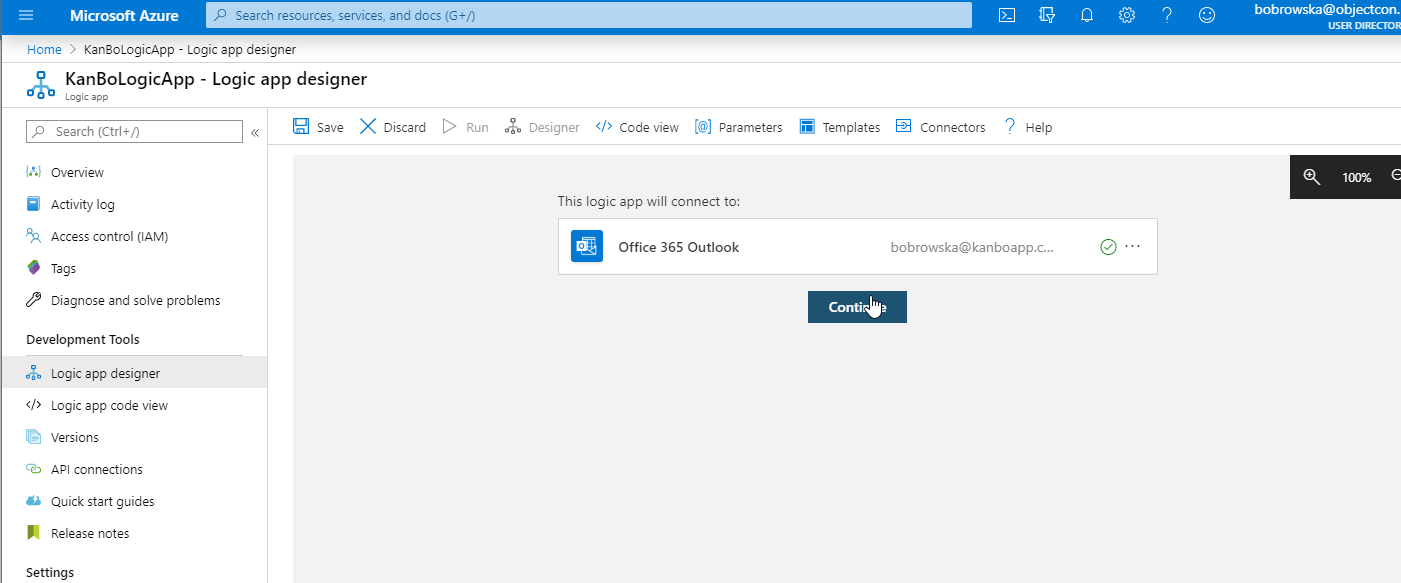
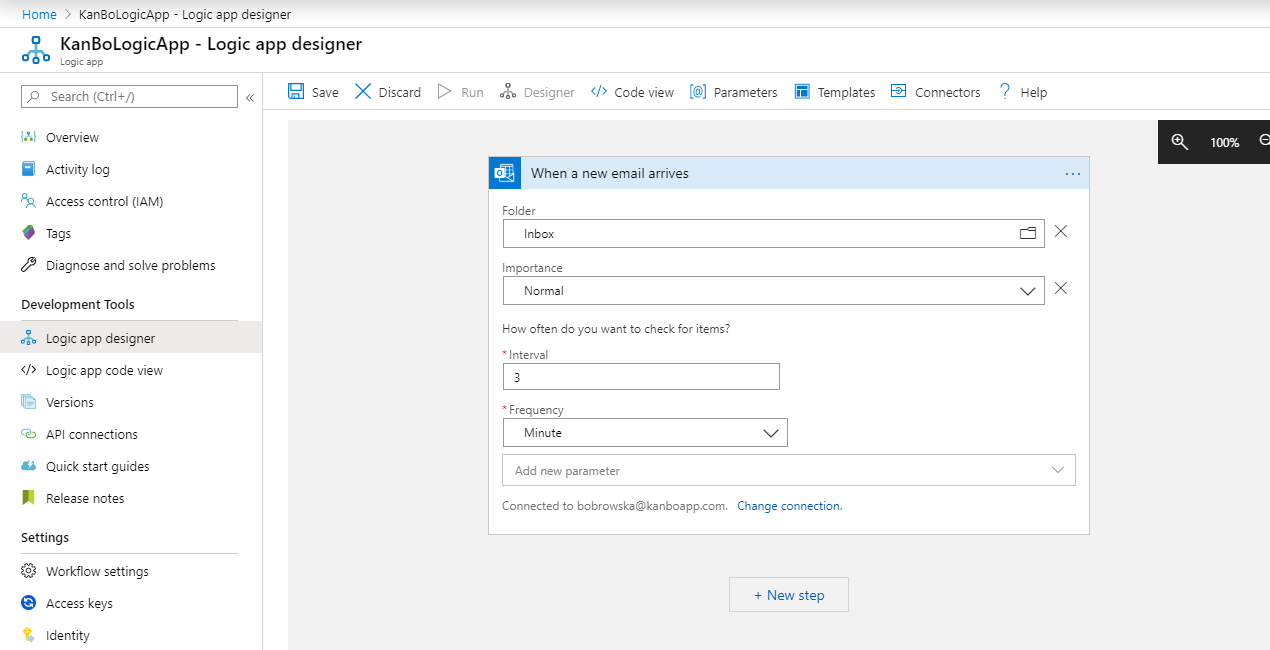
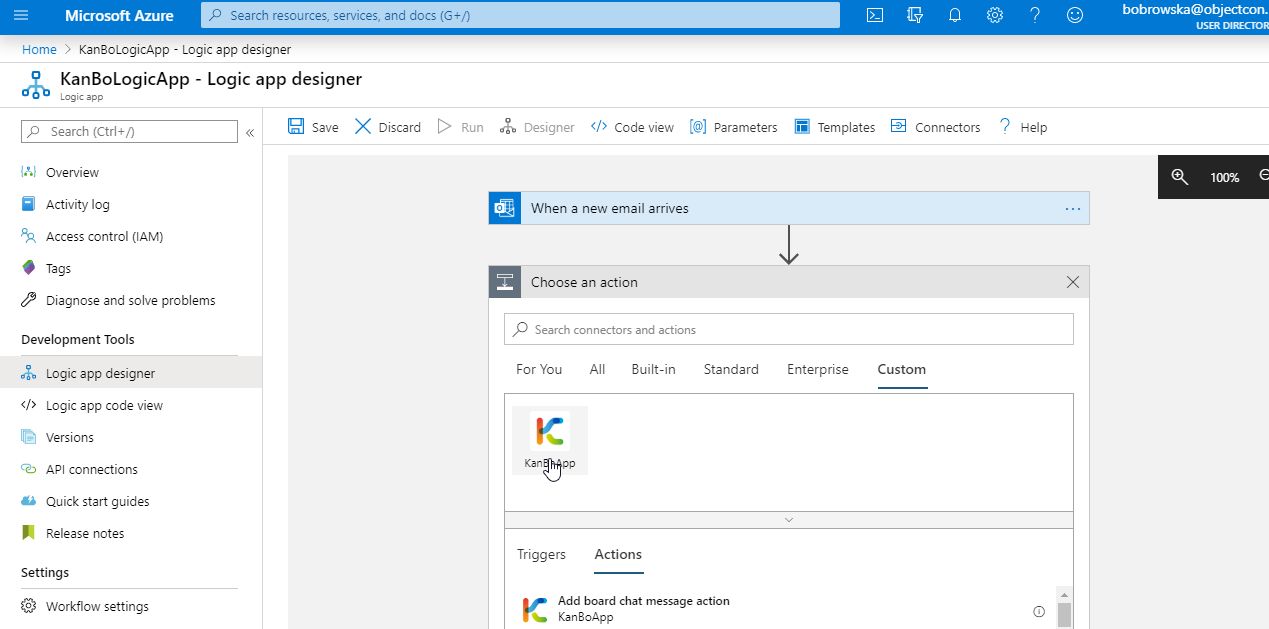
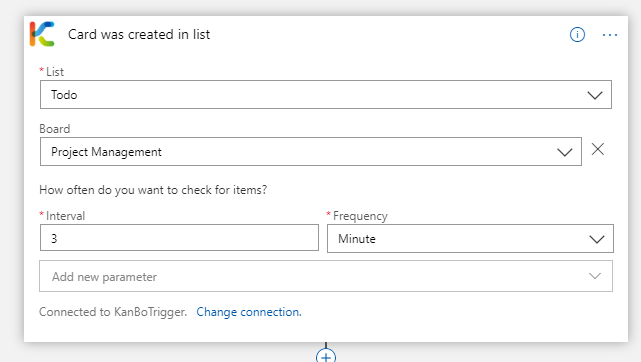
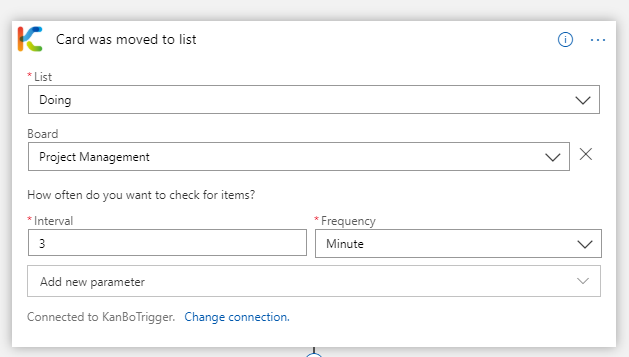
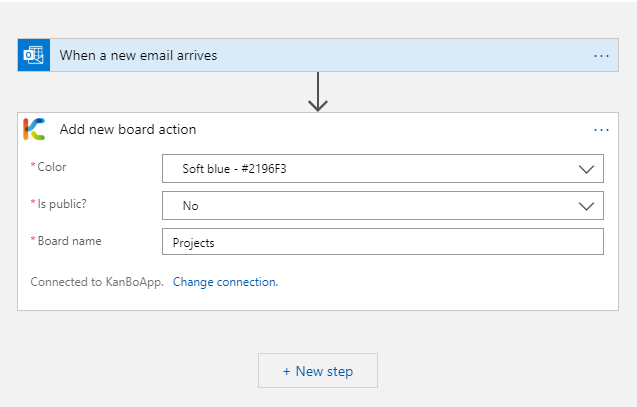
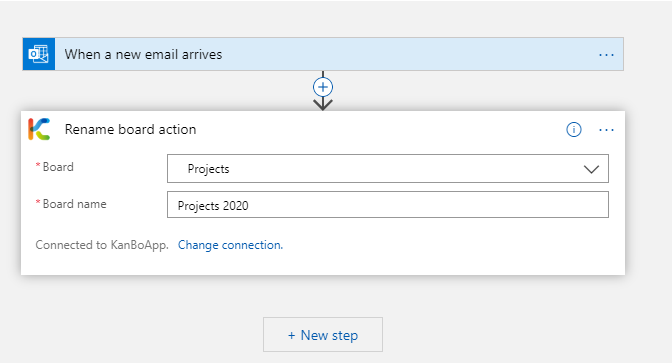
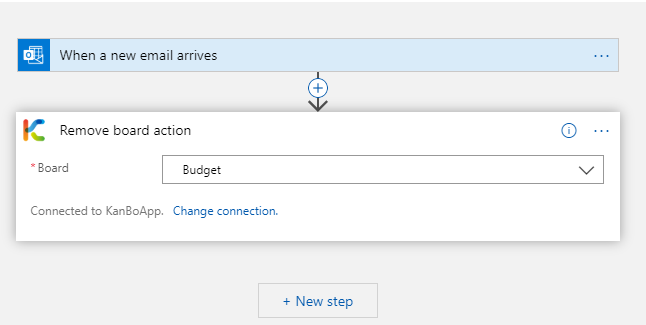
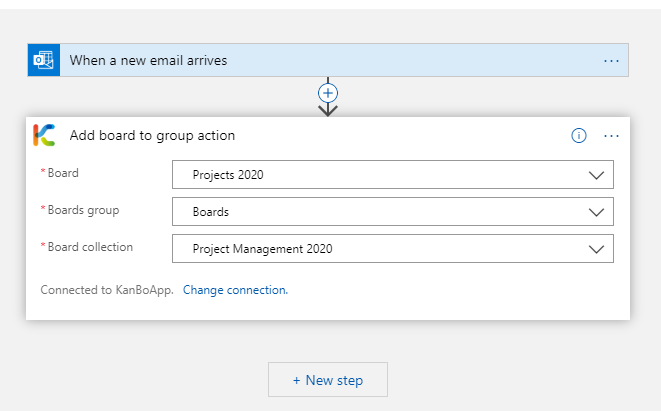
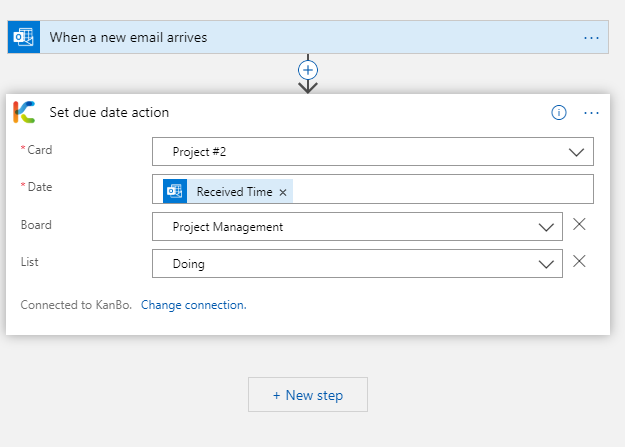
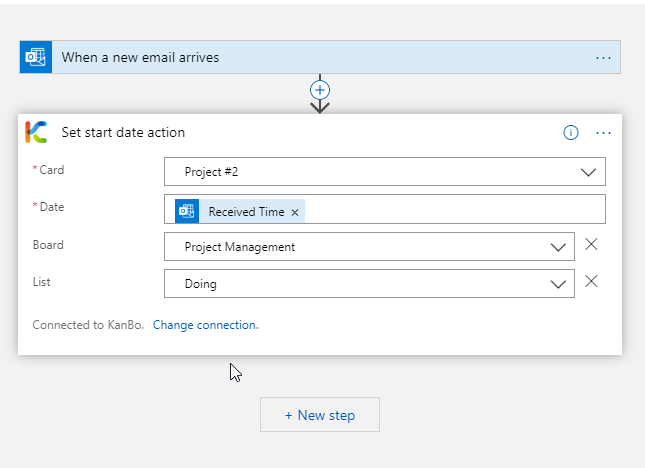
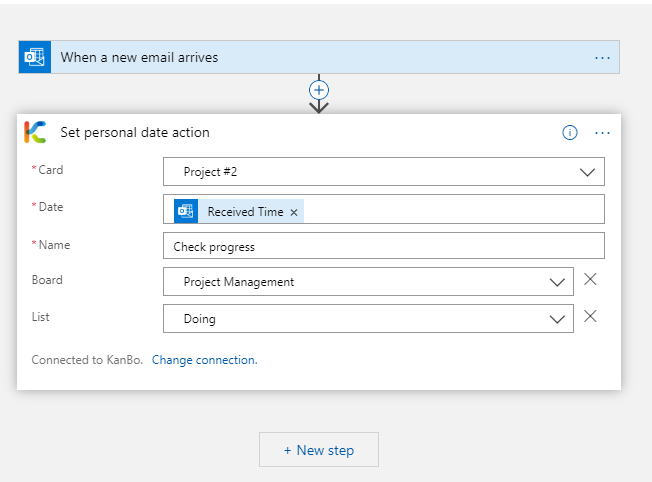
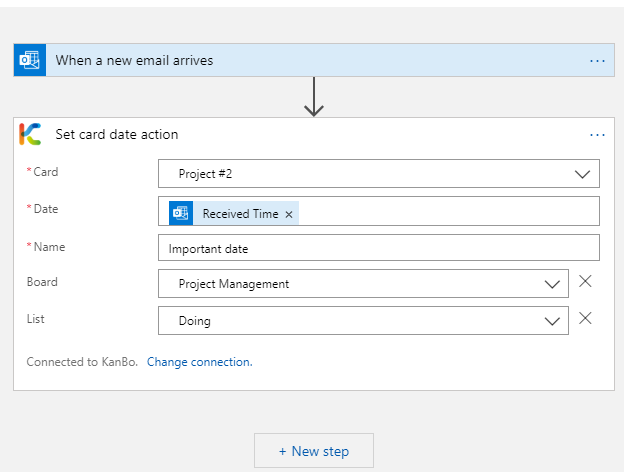
KanBo and Azure Logic Apps integration
Last modified:
KanBo and Zapier integration allow you to automate KanBo actions by building Logic Apps.
Preparing a Logic App
1. In Azure, create a new Azure Logic App.
See more information here: https://docs.microsoft.com/bs-latn-ba/azure/logic-apps/quickstart-create-first-logic-app-workflow.
2. In your Logic App, go to Logic App Designer.
3. Select a Trigger to start. In our example, it will be 'When a new email is received in Outlook.com'.
Now configure your trigger (it can be a KanBo trigger or external trigger). In our case, Flow will be triggered when a new email comes - which is an external trigger.
4. Configure the trigger and select Continue.
5. Now select the +New step.
6. Select KanBo or a particular action to start.
Triggers configuration
You can use external triggers (for example new item in SharePoint list, new email in Outlook etc.) or KanBo trigger.
There are 6 KanBo triggers:
New card created in the list
Card moved to a list
User added to a card
Labels added to a card
Card gets completed
Card is overdue
Actions
User actions
Add user to KanBo
Add user to board
Add user to the card
In this action, you must manually add Board and List parameters.
Add user to board collection
Deactivate user
Set user as responsible
In this action, you must manually add Board and List parameters.
Remove user from card
In this action, you must manually add Board and List parameters.
Remove user from board
In this action, you must manually add Board parameter.
Remove user from board collection
Board Collection
Add board collection
Move board collection
TIP: 0 position would be the first one on the top, 1 would be the second one etc.
Remove board collection
Rename board collection
Board Group actions
Add board group
TIP: 0 position would be the first one on the top, 1 would be the second one etc.
Rename board group
Remove board group
Board actions
Add board
Rename board
Remove board
Add board to board group
Change board color
Close board
Remove board from board group
Add board chat message
TIP: You can use custom text or a value generated from the trigger. In case you are using receiving a new email message as a trigger, you can, for example, choose the email's body content in the Message value.
Labels
Add label
Rename label
Add label to card
Change label color
Remove label
Remove label from card
Status actions
Enable statuses
Disable statuses
Add status
TIP: 0 position would be the first one on the top, 1 would be the second one etc.
Change status role
Change status color
Rename status
Remove status
Set status on a card
List actions
Add list
TIP: 0 position would be the first one on the left, 1 would be the second one etc.
Change list color
Move list
TIP: 0 position would be the first one on the left, 1 would be the second one etc.
Remove list
Rename list
Card actions
Add card
Rename card
Add card from template
Add comment on card
TIP: You can use a custom text or a value generated from the trigger. In case you are using receiving a new email message as a trigger, you can, for example, choose the email's body content in the Message value.
Archive card
Move card
TIP: 0 position would be the first one on the top, 1 would be the second one etc.
Remove card
Date actions
Set due date
TIP: You can type a custom date or use data from your trigger like received time of an Outlook email.
Set start date
TIP: You can type a custom date or use data from your trigger like received time of an Outlook email.
Set personal date
TIP: You can type a custom date or use data from your trigger like received time of an Outlook email.
Set card date
TIP: You can type a custom date or use data from your trigger like received time of an Outlook email.
Remove due date
Remove start date
Remove personal date
Remove card date
Note actions
Add note
TIP: 0 position would be the first one on the top, 1 would be the second one etc.
TIP: You can use a custom value or value generated from the trigger in Text field. In case you are using receiving a new email message as a trigger, you can, for example, choose the email's body content in the value.
Edit note
TIP: You can use a value generated from the trigger. In case you are using receiving a new email message as a trigger, you can, for example, choose the email's body content in the Message value.
Todo list actions
Add Todo list
Add Todo list item
Rename Todo list item
Complete Todo list item
Uncomplete Todo list item
Remove Todo list item
Relations actions
Make parental relation
Remove parent
Remove child
Make horizontal relation
Remove successor
This action removes both successor (next) and predecessor (previous) cards.
Add Child card group action
Add Child card group item action
Change content element position action
Remove element
Changes name of a Note, Todo list and a Child card group.
Rename element
Changes name of a Note, Child card group or Todo list.Incoming Mails
Create new public address of a card
Create new private address of a card
Get cards public address
Get cards private address
Remove public address of a card
Remove private address of card
Create new public address of a board
Create new private address of a board
Get boards public address
Get boards private address
Remove public address of a board
Remove private address of board
Get actions
Get actions allow you to get values from KanBo elements so you can use them in next actions of your flow (for example: use "card creator" value to add him to a next card that will be created in a flow).
Get Card Creator
You will be able to get information who created a card (user's name or ID).
Get Card
You will be able to get information: ID, Name and List of items.
Get Todo List
You will be able to get information: ID, Name, Items [id, name].
Get Note
You will be able to get information:ID, Name, Text inside.