Setting Up KanBo Email Notifications on Azure
Table of Contents
Following article describes configuration of KanBo email notifications. Only unread notifications are sent by email.
Each user can tun it on or off individually and specify sending intervals.
1. Prepare email notifications package
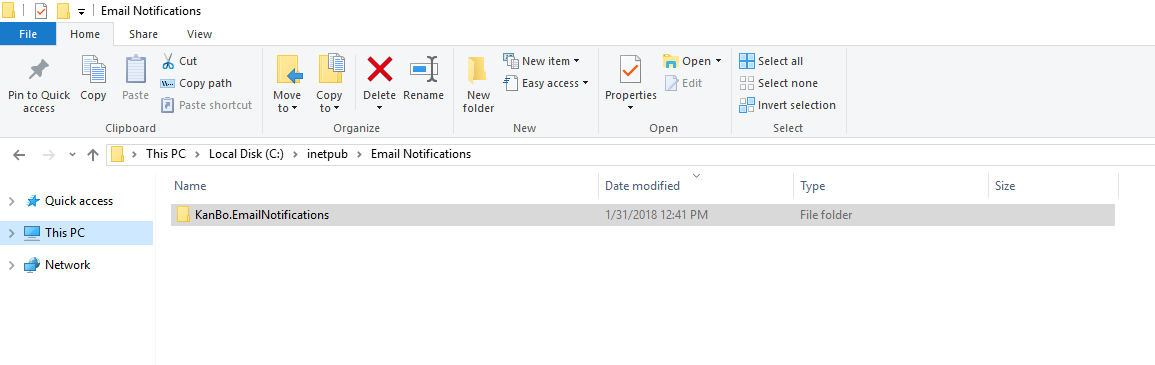
Unzip the KanBo.JobHost to the desired location. The location can be for example a folder named "Email Notifications".
2. Update appsettings.json file with your parameters
- Copy the connection string from the KanBo appsettings.json and paste it into the Email Notifications' appsettings.json.
{
      "ConnectionStrings": {
        "KanBo": "Connection String"
      },
- Past the below code snippet after the "load-packages", line and fill up the information in brackets.
{
        "type": "package",
        "name": "auth-aad",
        "client-id": "{Client ID from the Azure Active Directory App Registration}",
        "tenant": "{Tenant ID from the Azure Active Directory App Registration}",
        "thumbprint": "{KanBo Certificate thumprint}"
       },
       {
        "type": "email.graph",
        "upn": "{Email address of the account that will send the notification emails}"
       },
       {
        "type": "job.email-notifications",
        "from": "{Email address of the account that will send the notification emails}",
        "name": "email-notifications",
        "link": "{Your KanBo URL with https://}",
        "title": "KanBo Notifications",
        "template": "template.html",
        "limit": 100
       }
      ]
     },
3. Create a WebJob on Azure
- After the config is updated, pack all the files inside the folder into a .zip package that will be used to create an Azure Webjob.
- To create a webjob, follow the steps from this article.
- Name the job "KanBoEmailNotifications" and set the CRON expressions to: "0 */15 * * * * ".
4. Turn email notifications on you KanBo account
- You should make sure that You have Your email address set in your KanBo User Profile.
- Navigate to "My settings" by clicking on your user picture.
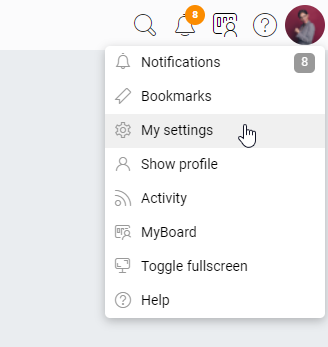
My Settings section will appear.
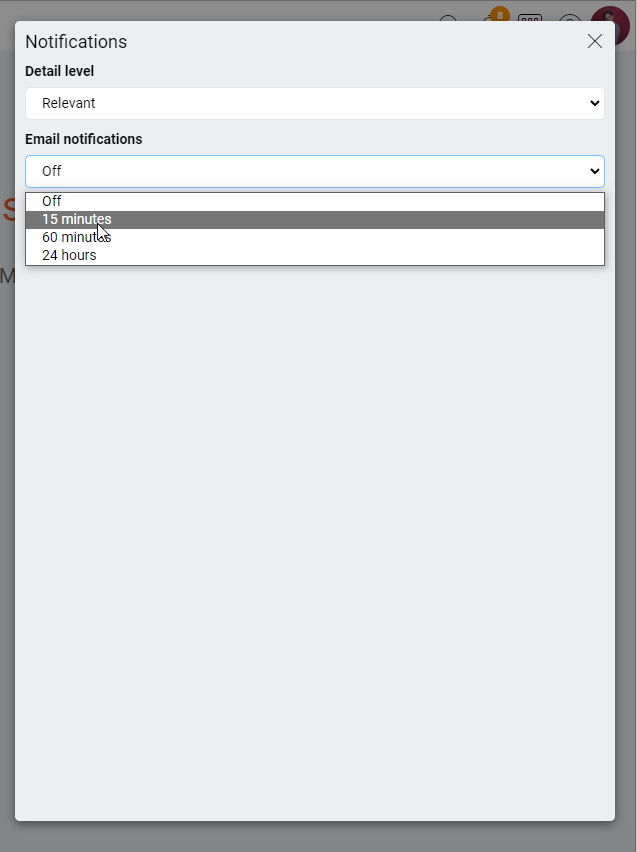
- Enter Notifications and set email notifications. You can disable them or configure them to appear every 15 minutes, 60 minutes or 24 hours.
From now on when you have a new notification in KanBo and you don't read it within KanBo or on your mobile App you will get email summing up all your unread KanBo notifications. Blow you can see an example of an email generated by KanBo.

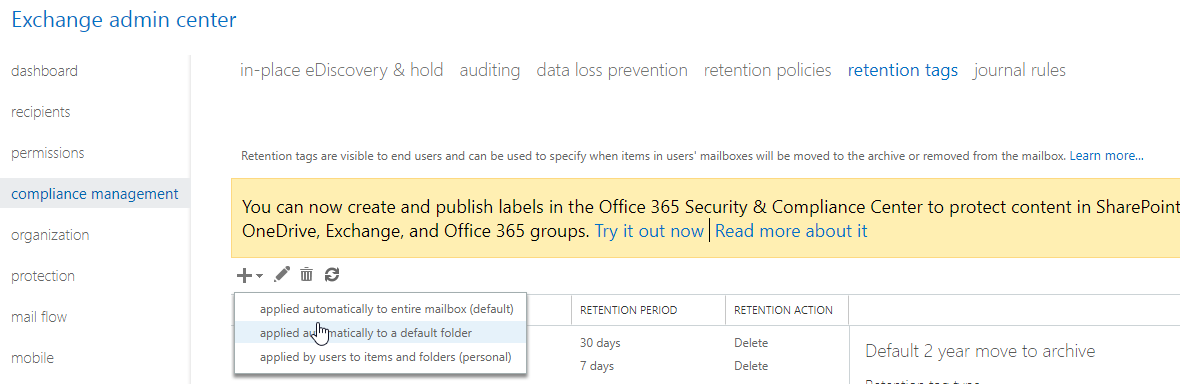
Recommendation: Set an Outlook retention policy to remove old messages
In order to not allow your Email Notifications mailbox to clog up, set a simple rule to clean messages older than a week.
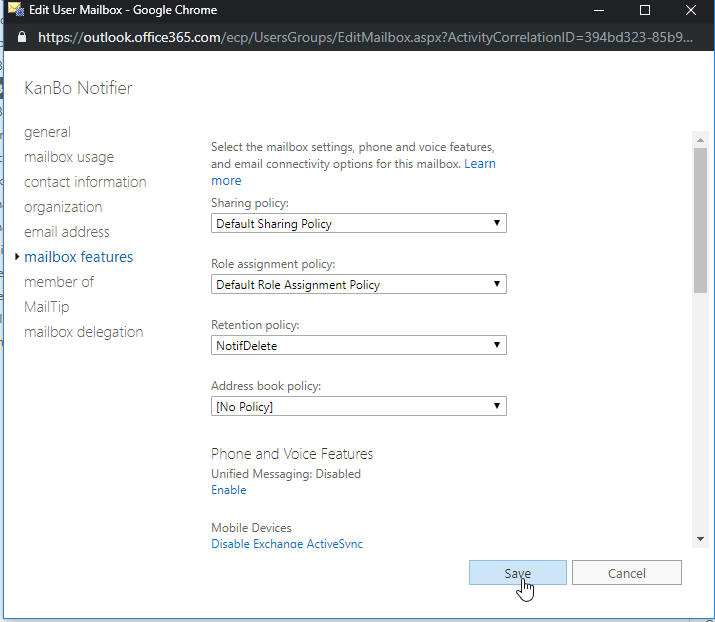
- As Exchange Administrator, got to Exchange Admin Center -> Compliance Management -> Retention Tags.
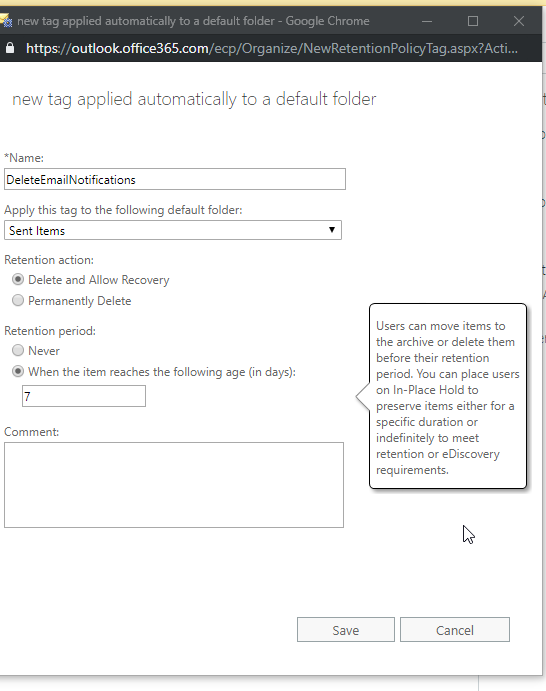
- Create a new rule "applied automatically to a default folder.
- Find out a name, select this tag to apply to Sent items only and choose retention period to 7 days.
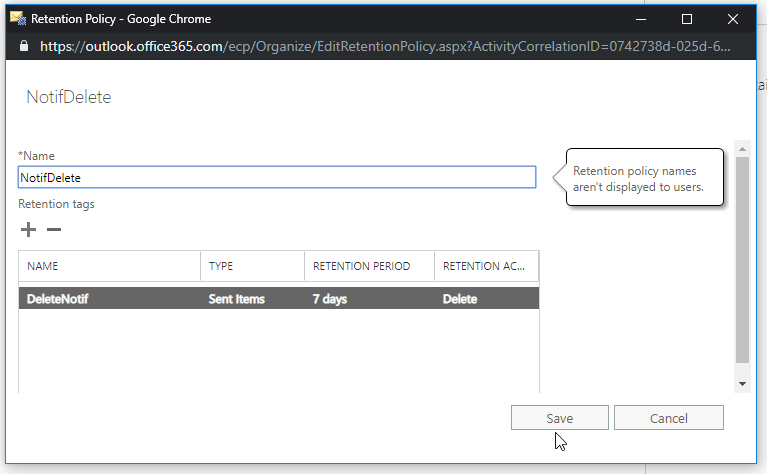
- Go to retention policies and create a new Retention policy with this retention tag assigned.
- Go to recipients, select your Email Notifications account and then in Mailbox features select your newly created Retention Policy.