Uninstall KanBo from Office 365
This post is also available in: Deutsch
- Search for your Web App.
- When it's found, click on
 next to Web App's name and select Delete.
 - Confirm this action.
 next to Web App's name and select Delete.
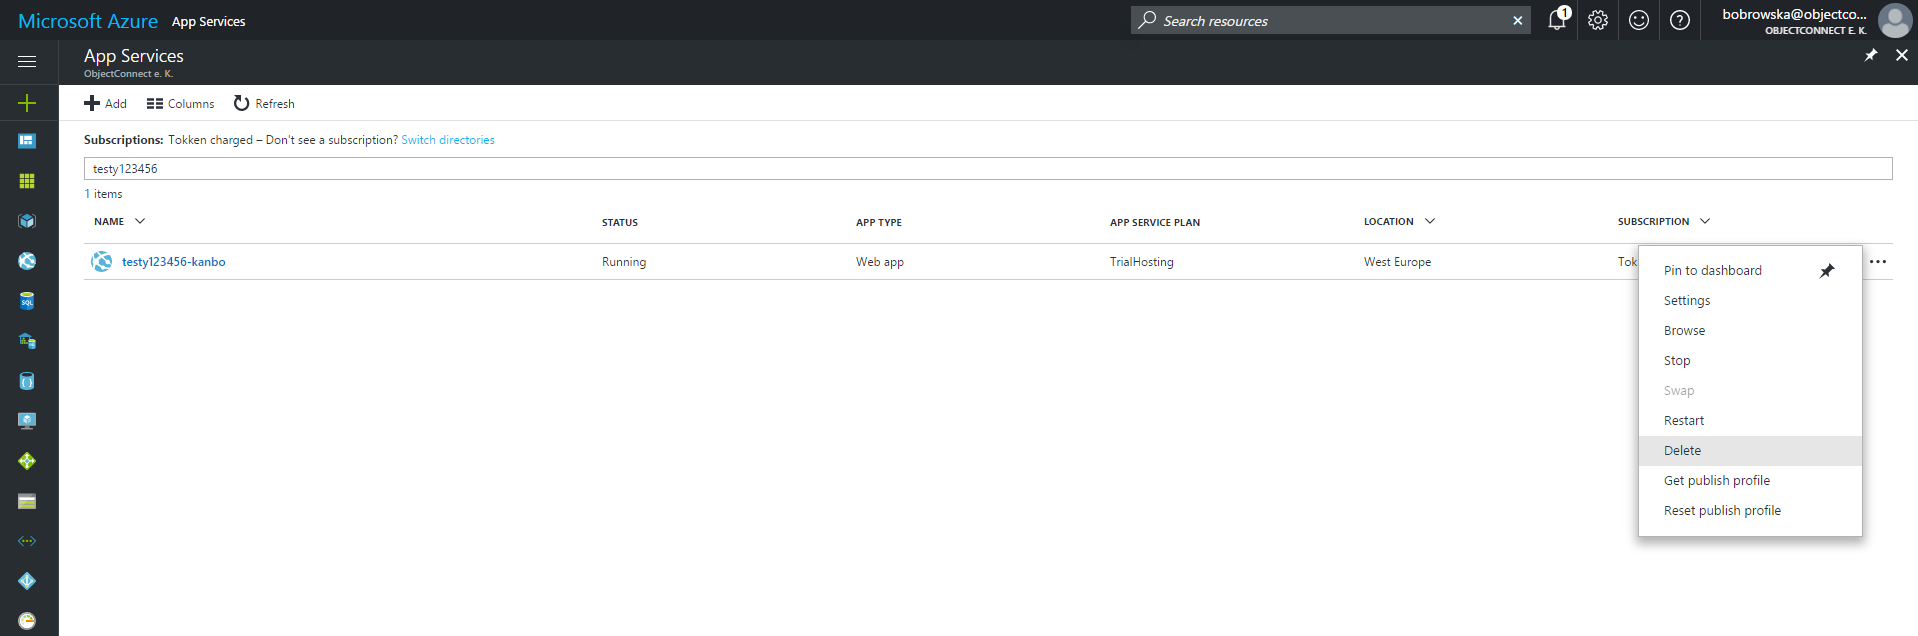
2. Remove databases
During the installation process, three KanBo SQL Databases are created: Content, Profiles and Instances databases.
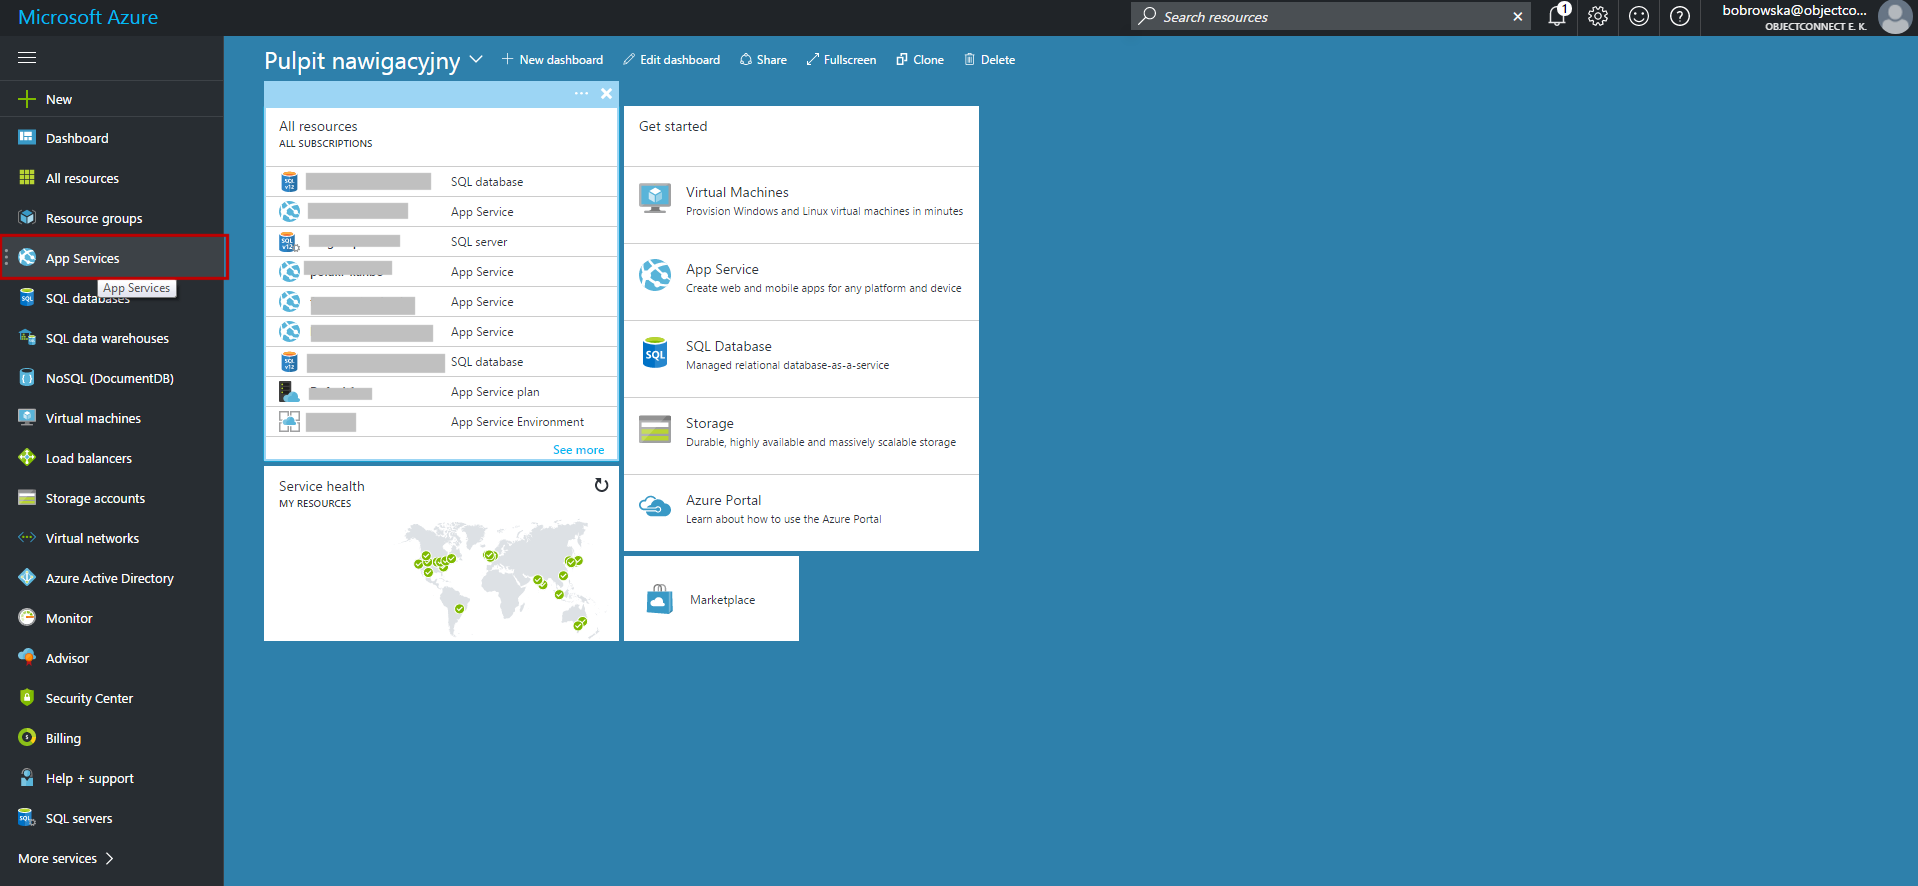
- Enter SQL Databases section in Azure.
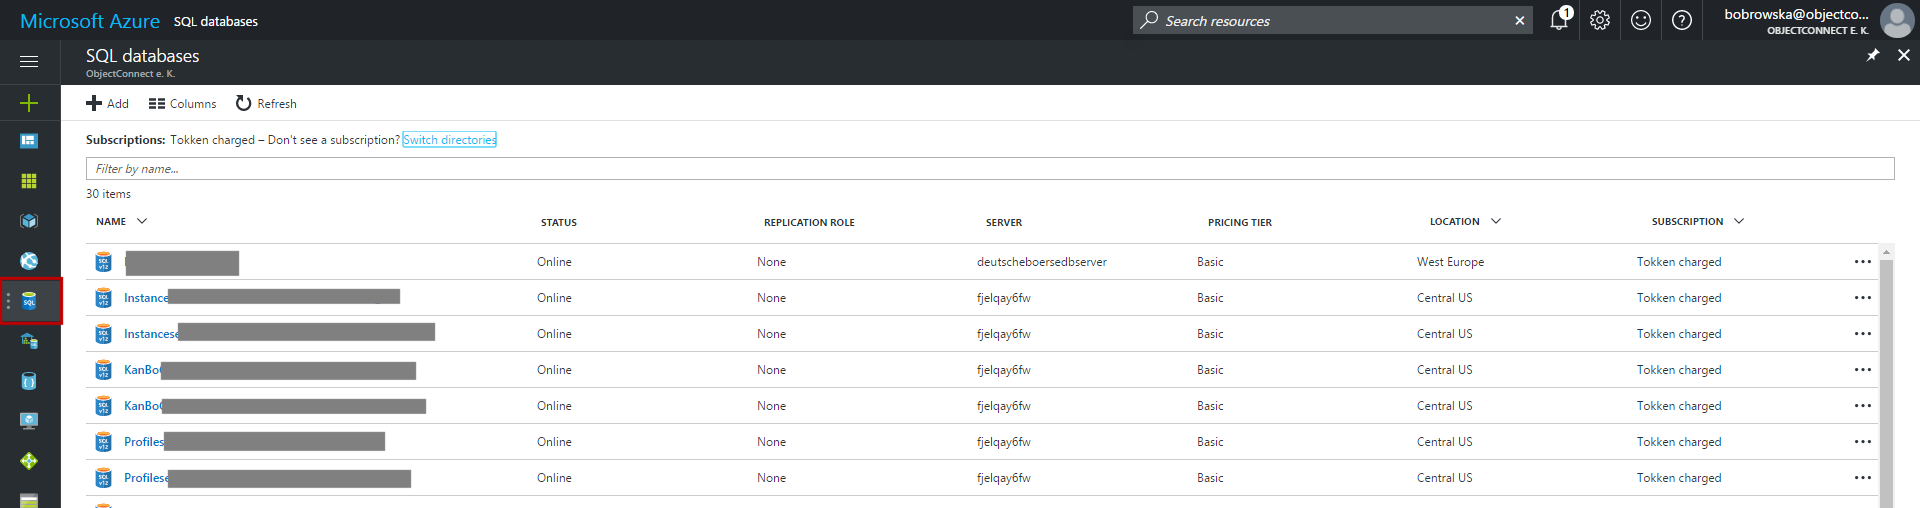
- Enter name of your databases (you can find it for example in connections strings in the web.config).
-
Click on button next to database's names and click on Delete. Confirm this action.
 button next to database's names and click on Delete. Confirm this action.
3. Remove Virtual Machine
In case a Virtual Machine was created on Azure to host KanBo Search component only, you can delete it and all its associated resources.
SharePoint part
1. Remove KanBo from App Catalog in SharePoint
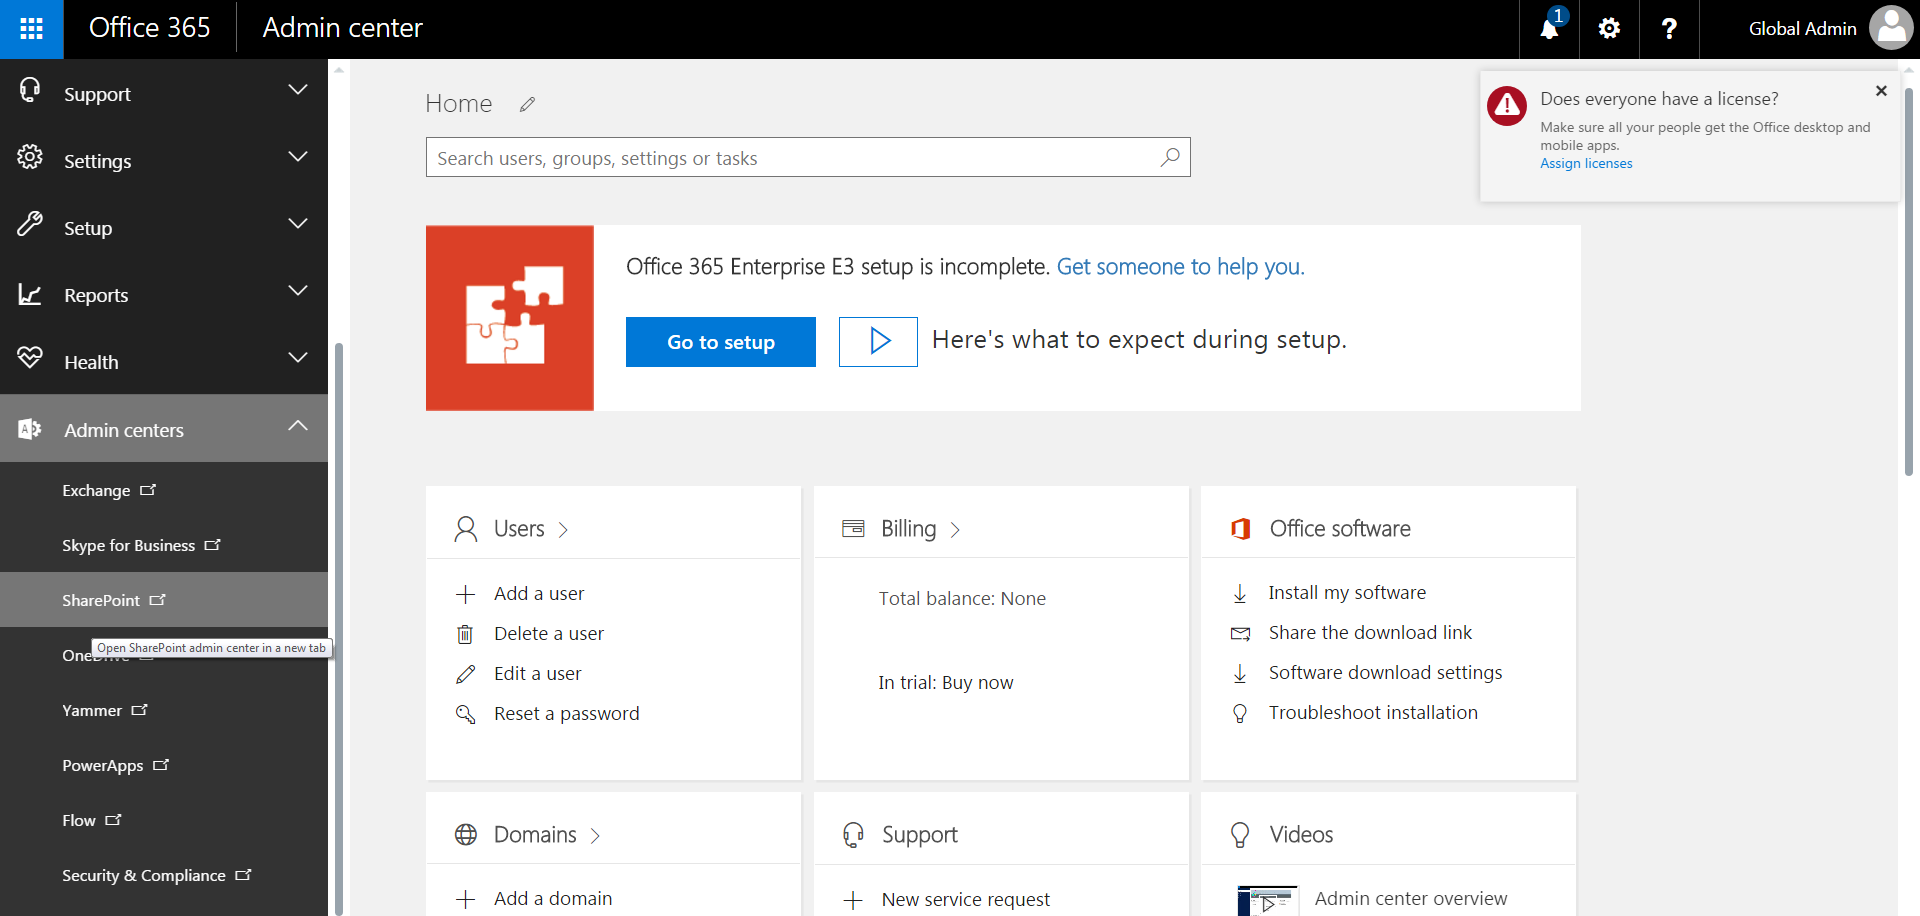
- Go to the Office 365 admin center and select SharePoint.
-
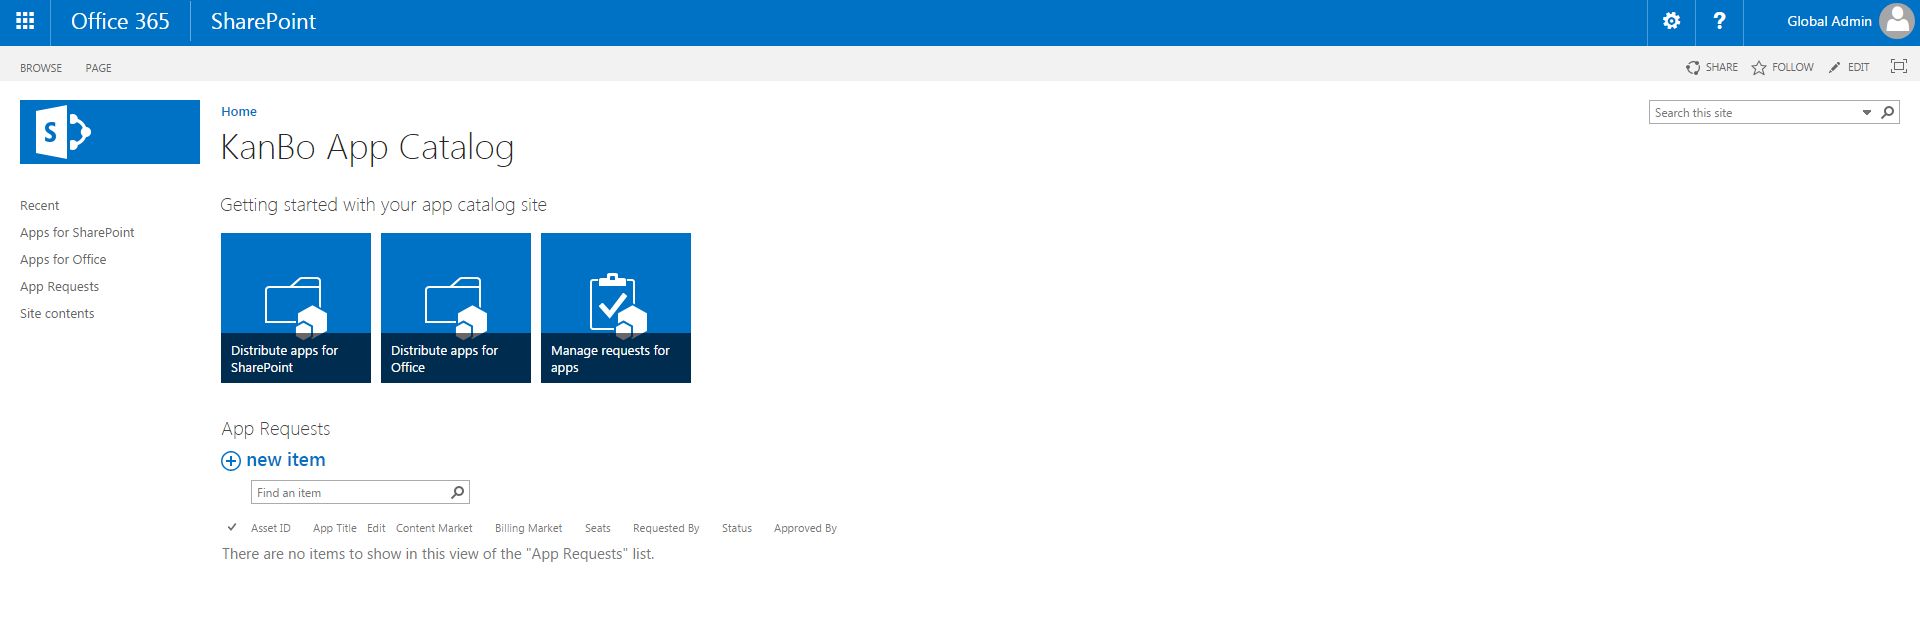
Go to Apps and then to App Catalog.

-
Click on Distribute Apps for SharePoint.
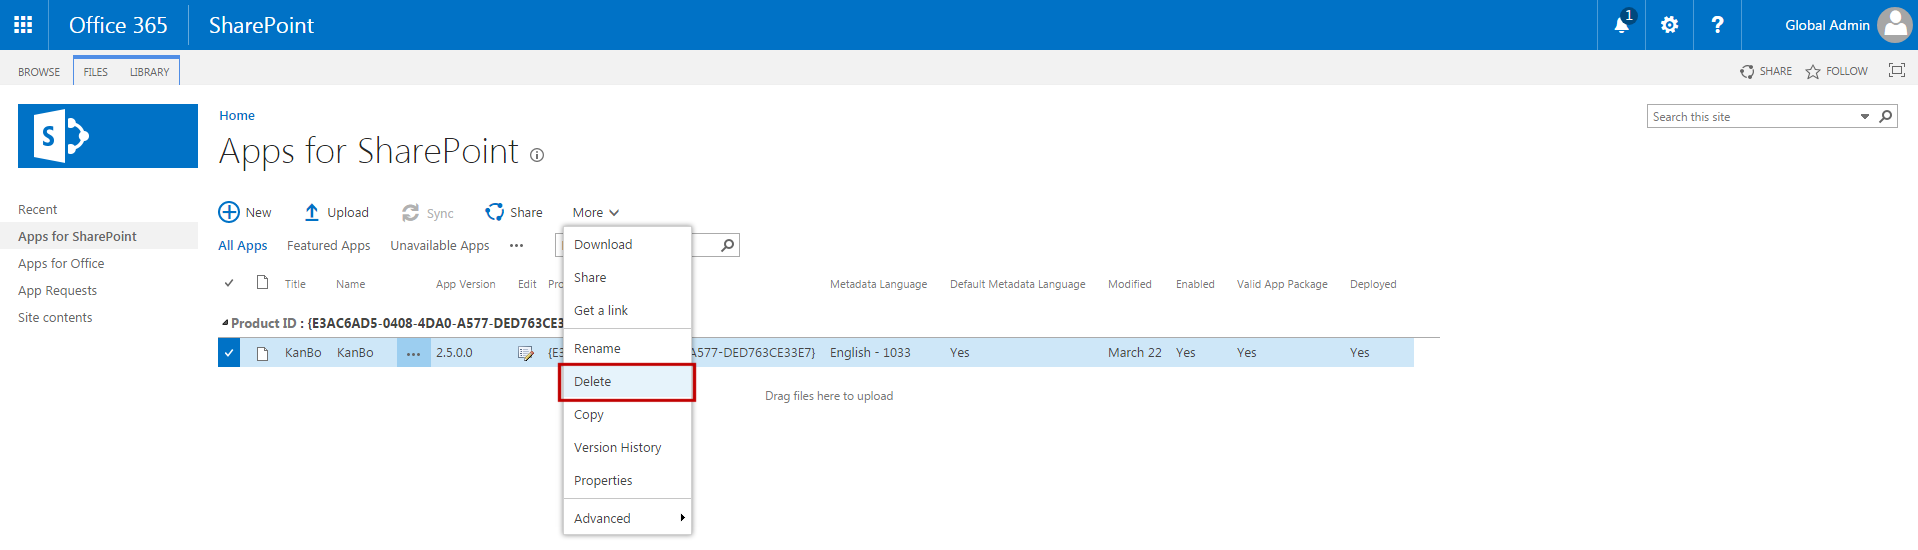
- Select KanBo.app, then click on More menu and select Detele. The KanBo.app will be placed in the Recycle bin.
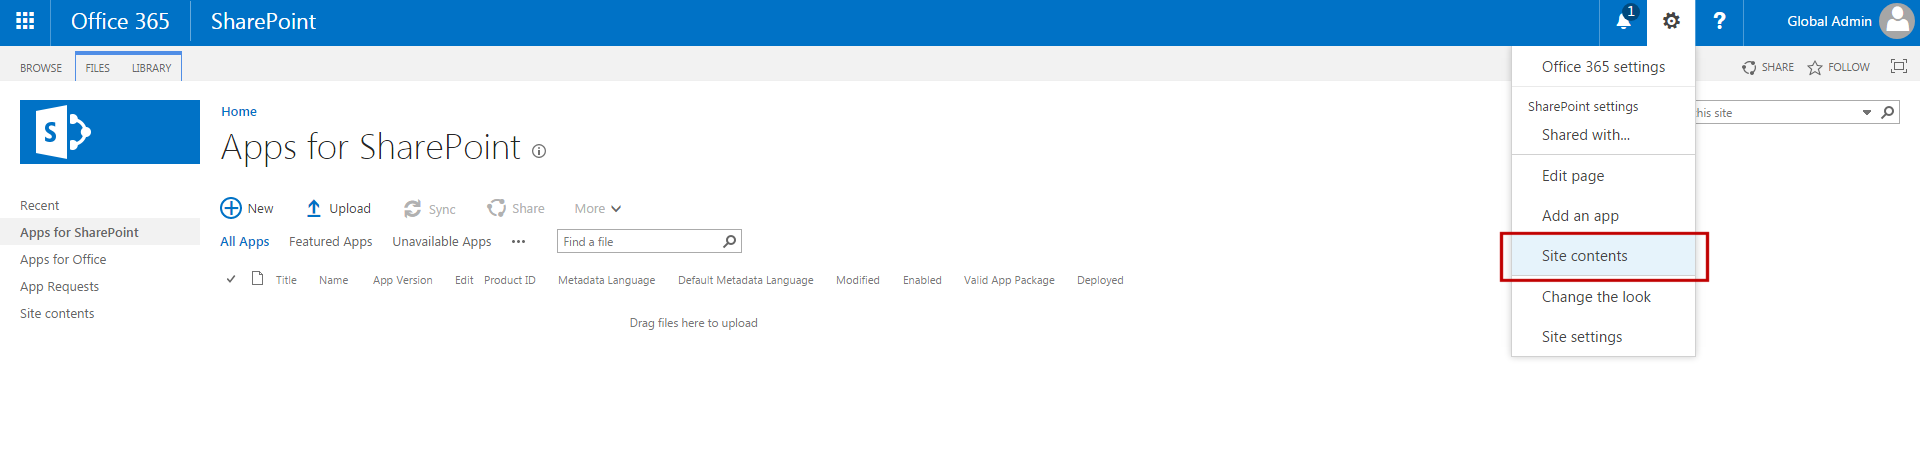
- Click on Settings icon and select Site Contents.
- Navigate to the Recycle bin.
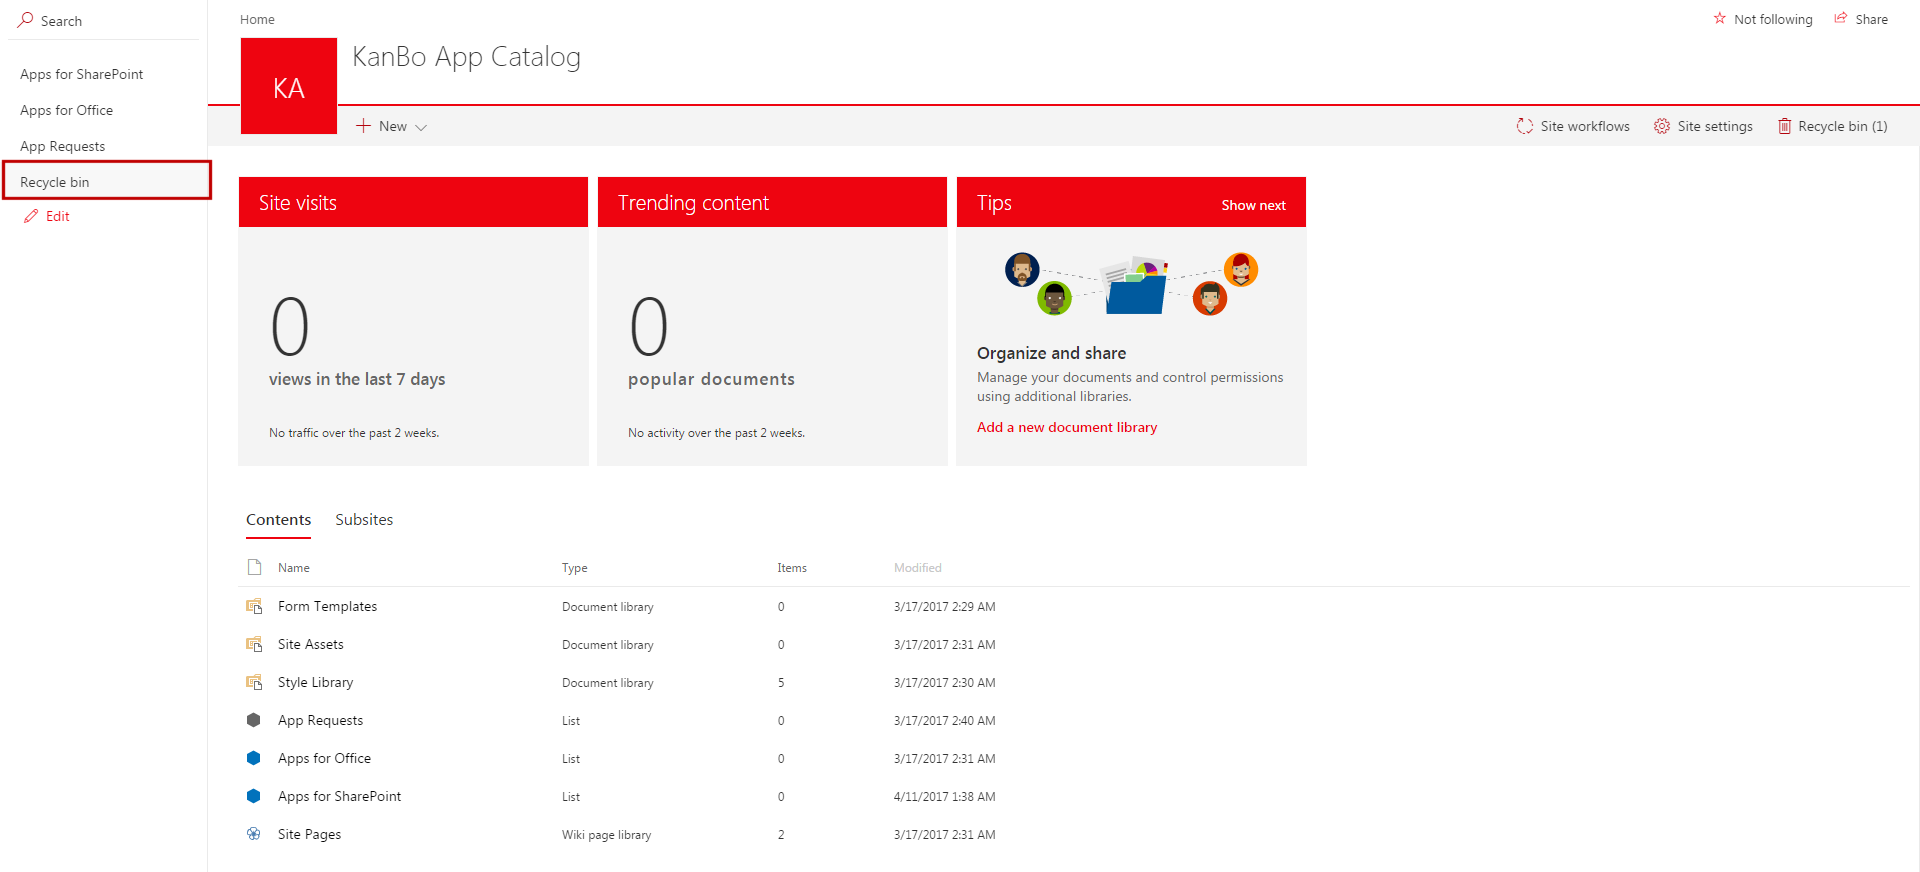
- Select KanBo and delete it.
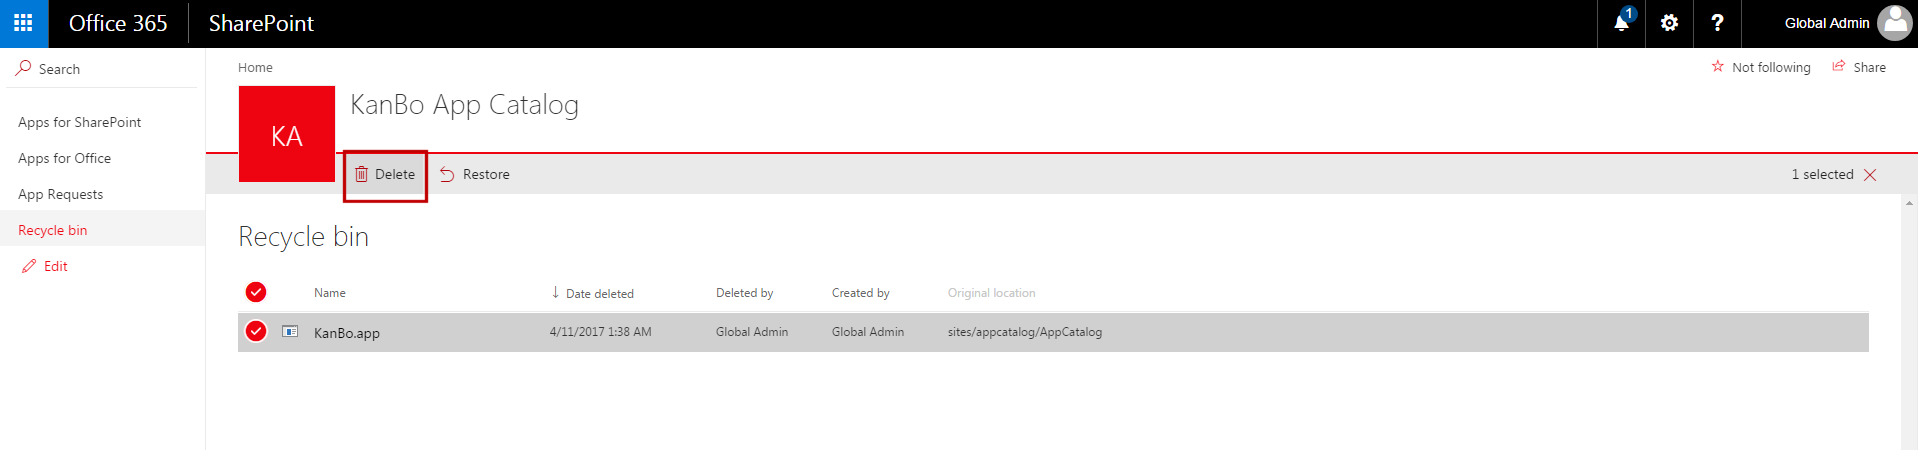
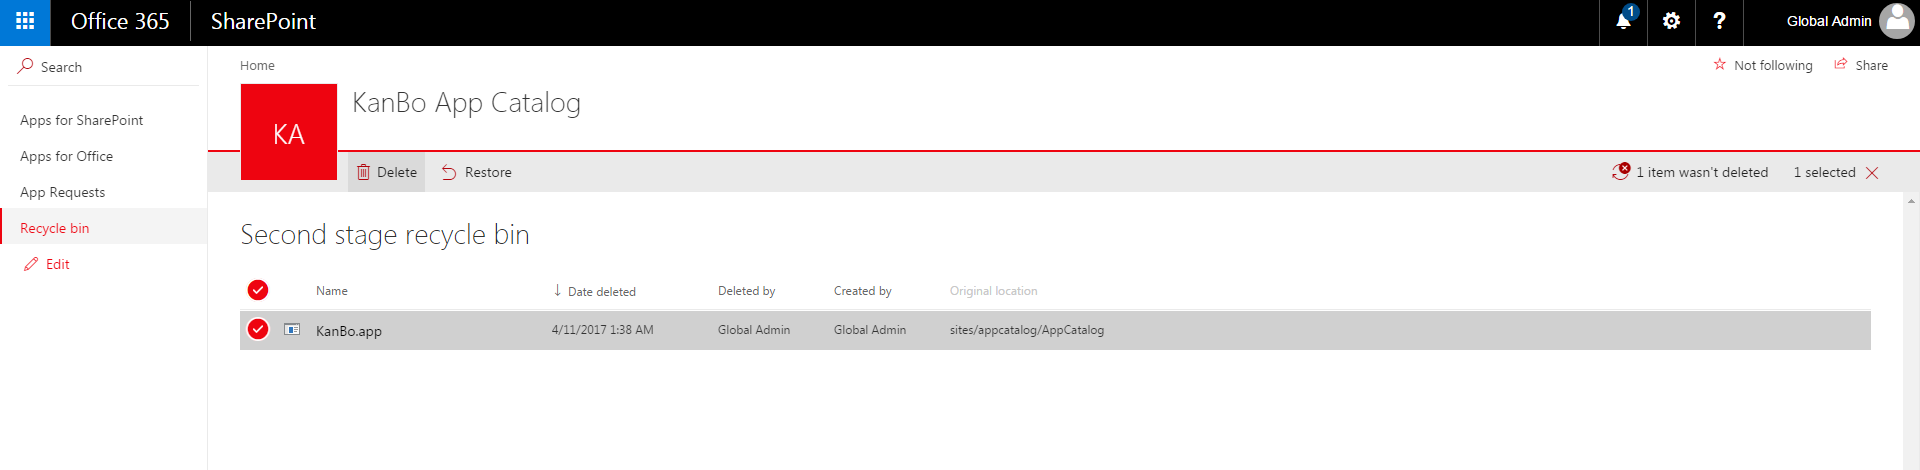
- KanBo has been deleted. Now navigate to the Second-stage recycle bin. You can find a link to it at the botton of the Recycle bin page.

- In the Second-stage recycle bin, select KanBo once again and delete it - this time KanBo will be deleted pernamently.
2. Remove KanBo in the Site Collection in SharePoint
We recommend KanBo to be installed in the individual site collection, not the Root Site Collection with other applications.
In such a scenario, you can delete the entire Site Collection and there would be no need to perform additional steps.
In a second possible situation, KanBo is installed on the Root Site Collection or any other Site collection with other applications and it is impossible to simply remove the Site Collection.
We are introducing the uninstallation steps for these two situations.
Scenario 1: KanBo is added to an individual Site Collection which can be deleted
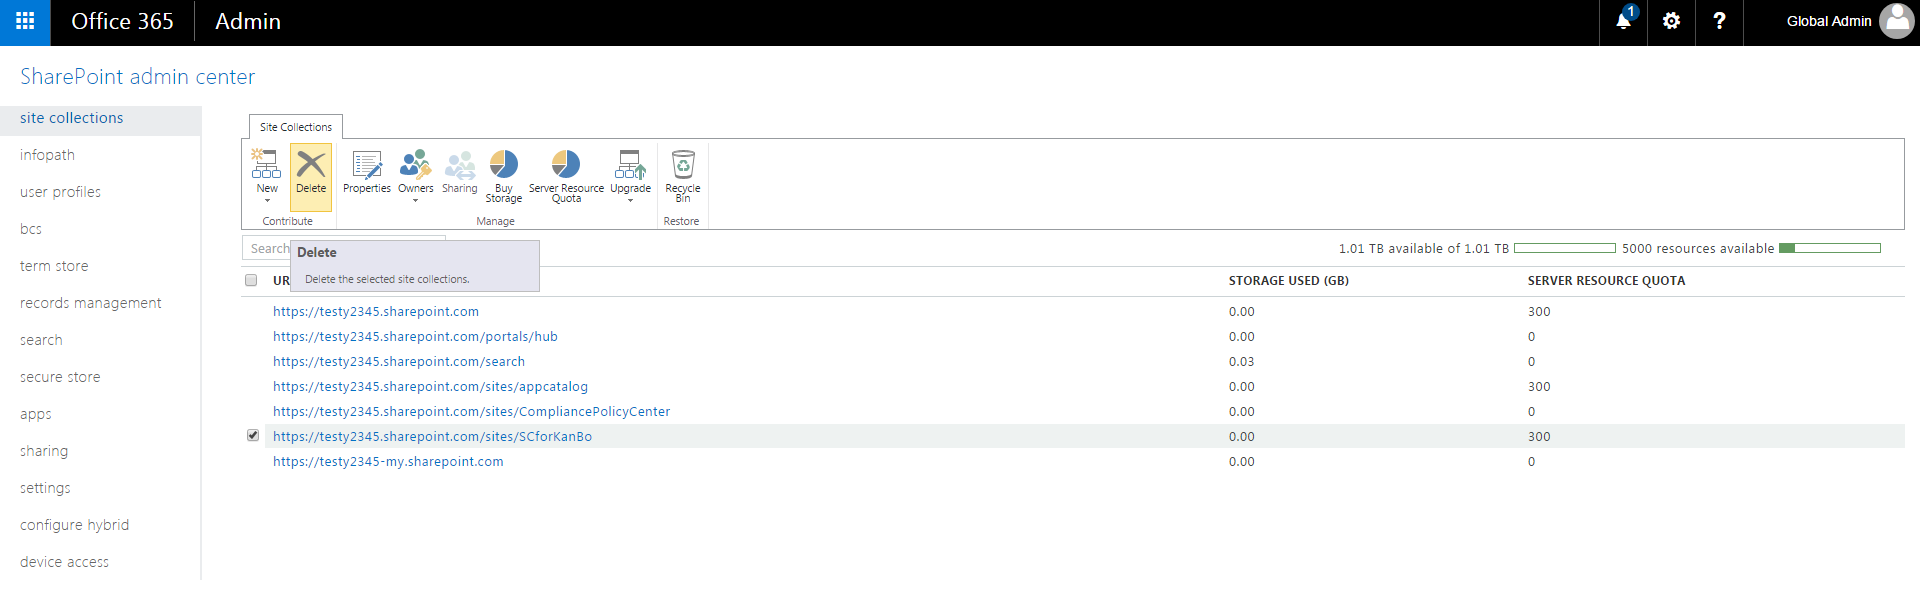
- Go to SharePoint admin center, then to Site Collection section.
- Select the Site Collection on which only KanBo is installed and click on Delete.
Scenario 2: KanBo is installed on the Root Site Collection or other important Site Collection which can't be removed
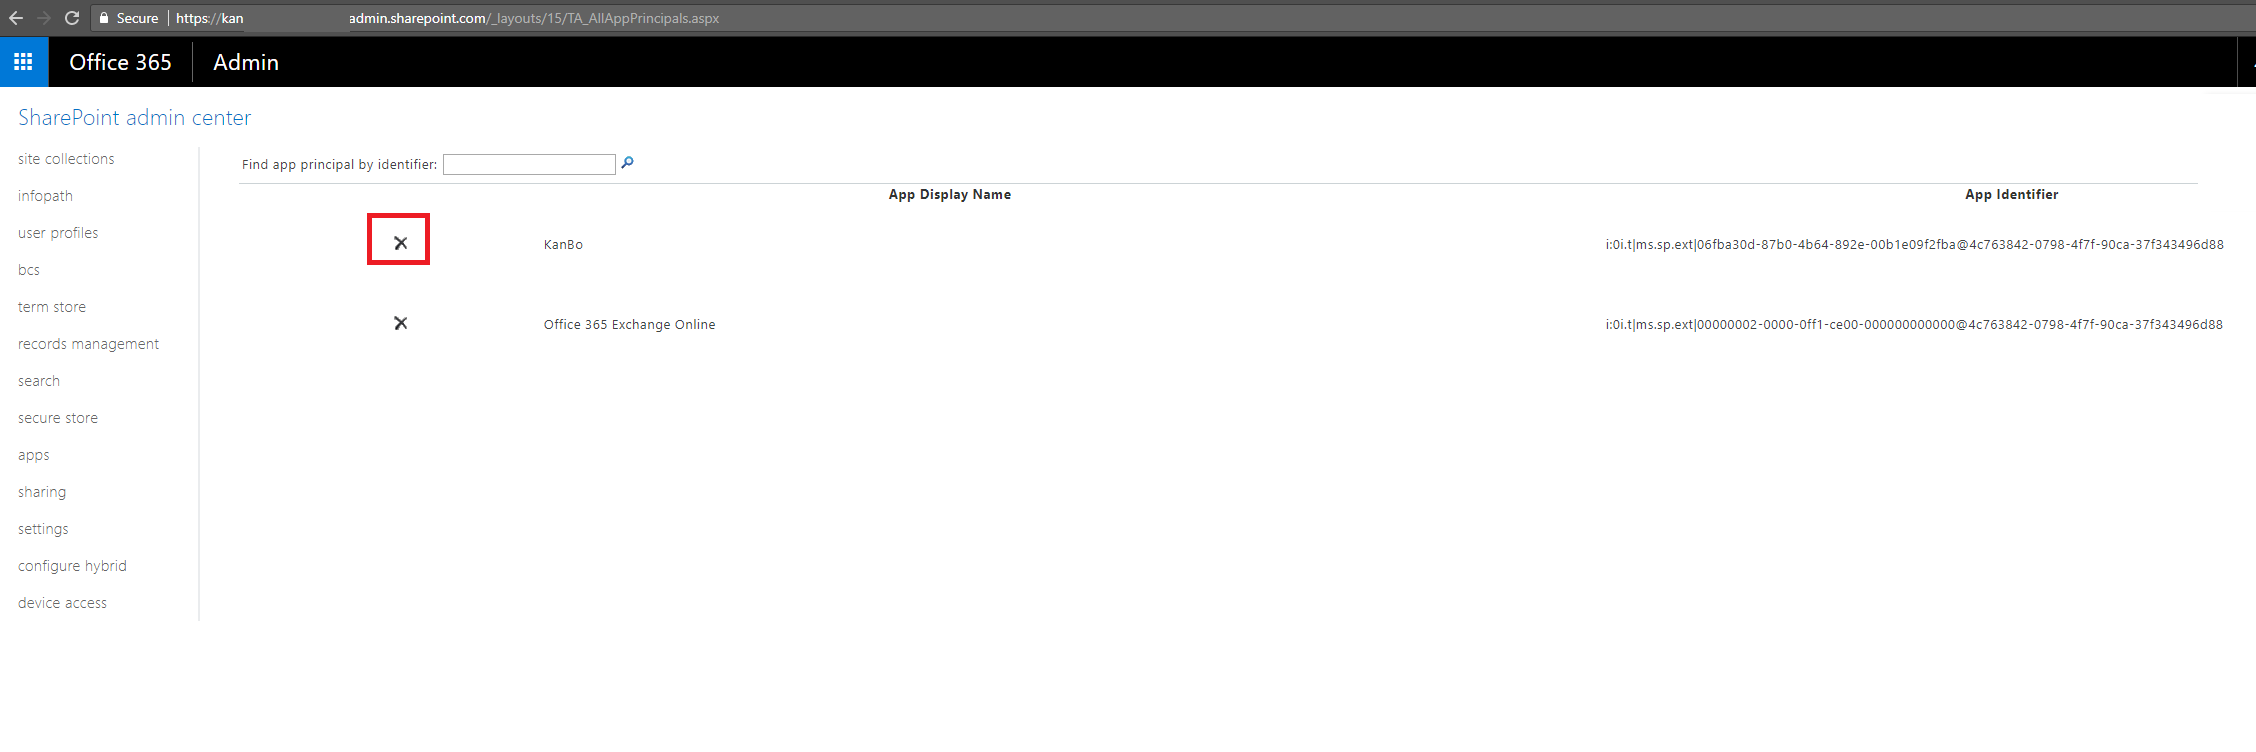
- As a first step, please remove the previous KanBo.app registration information.
- In order to remove the registration information from the previous installation, enter https://YOURTENANTNAME-admin.sharepoint.com/_layouts/15/TA_AllAppPrincipals.aspx (please change the YOURTENANTNAME value to your own).
- Delete the KanBo using the X button.
- Delete KanBo from the Site Collection.
- Go to the Site Collection where KanBo is installed.
- Enter Site Contents in the left pane or in Settings -> Site Contents.
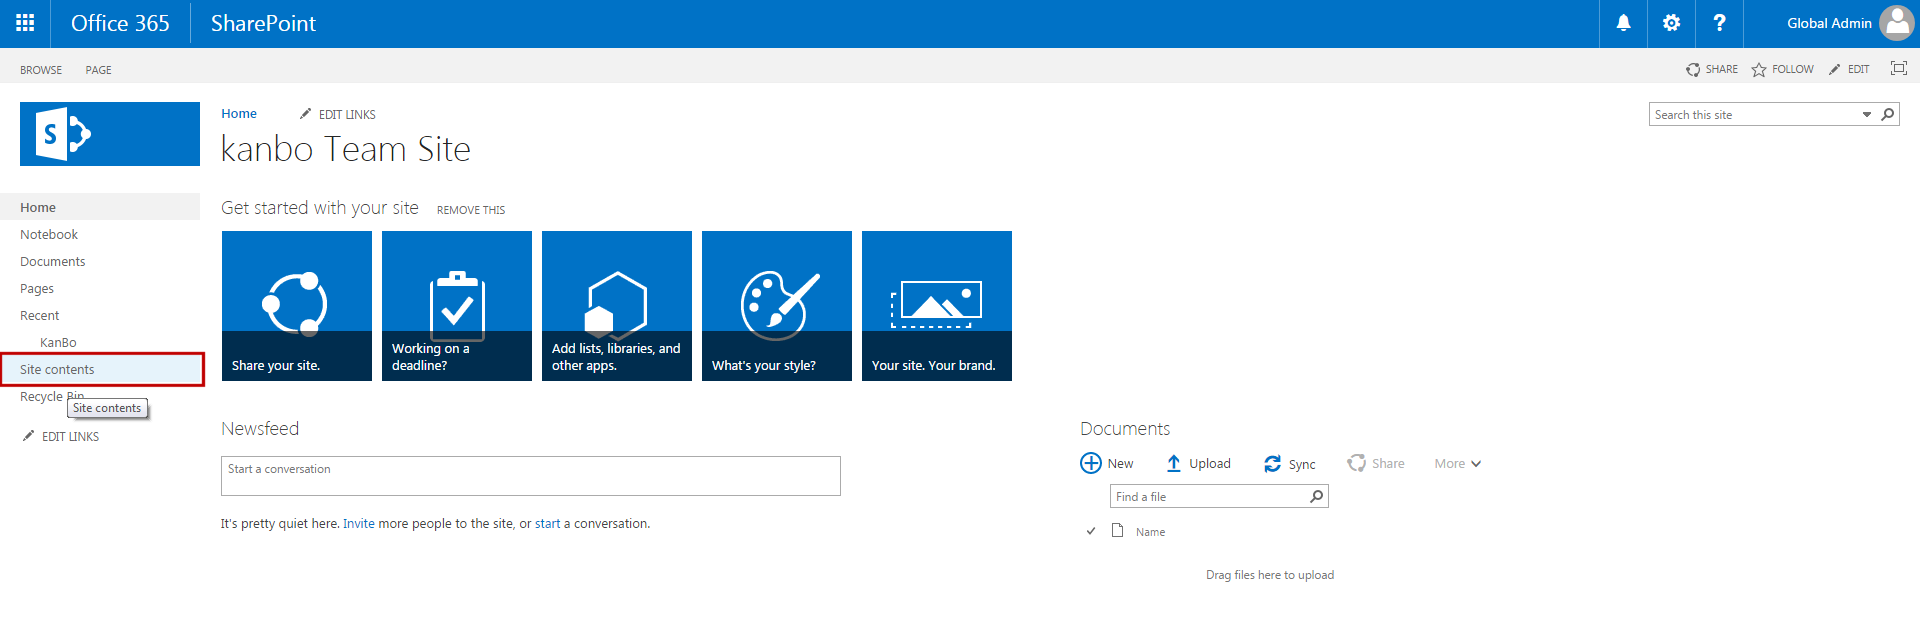
- In Site Contents, click on Return to classic SharePoint link.

- Click on button in the KanBo tile and select Remove. Wait untill KanBo gets removed.
 button in the KanBo tile and select Remove. Wait untill KanBo gets removed.
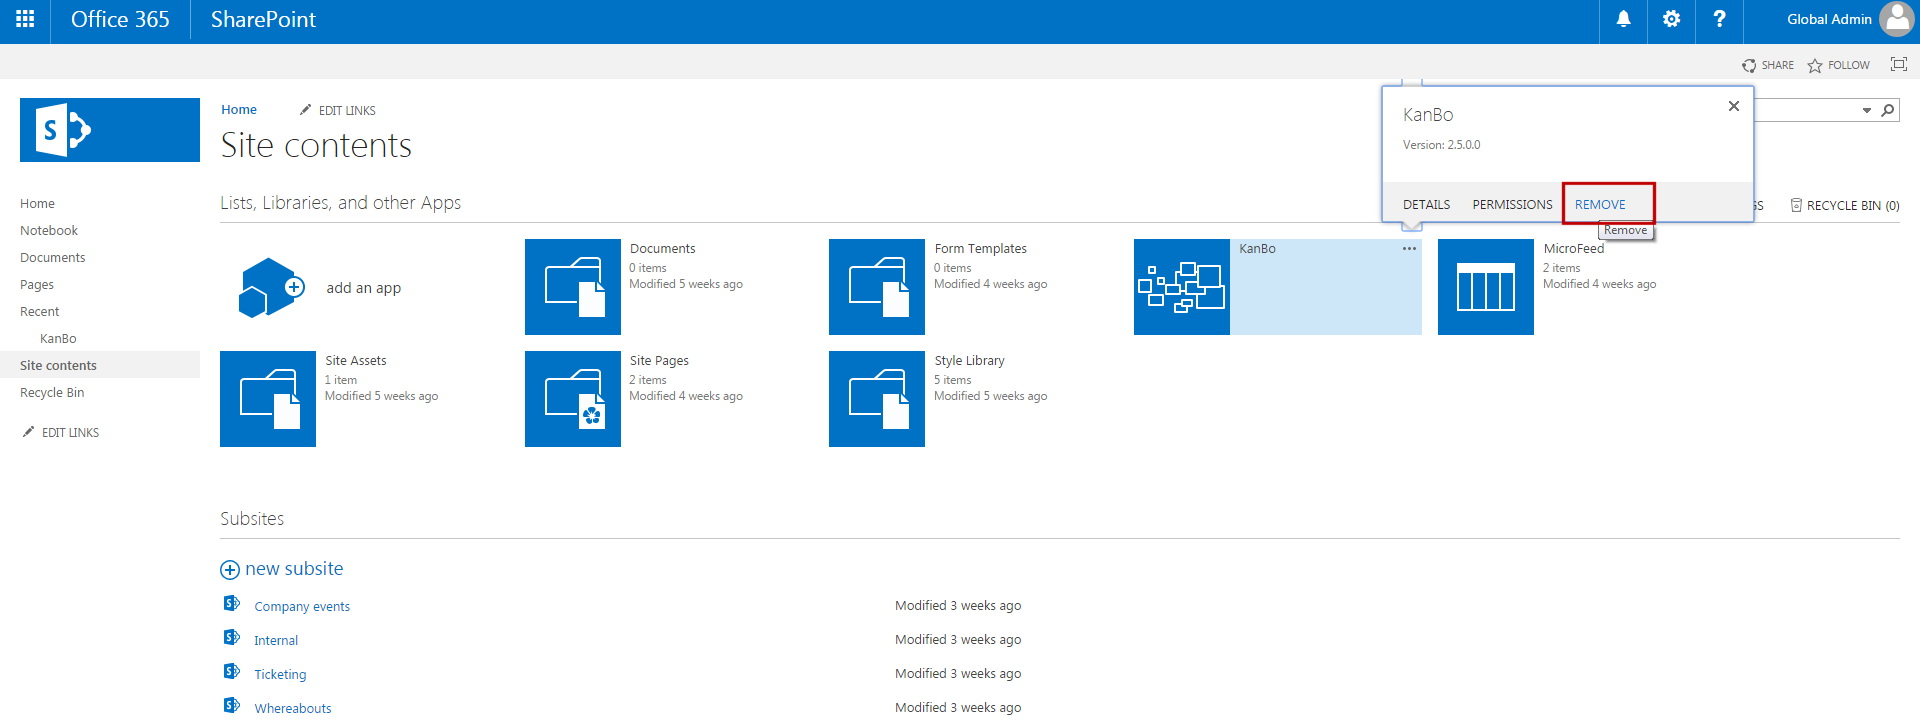
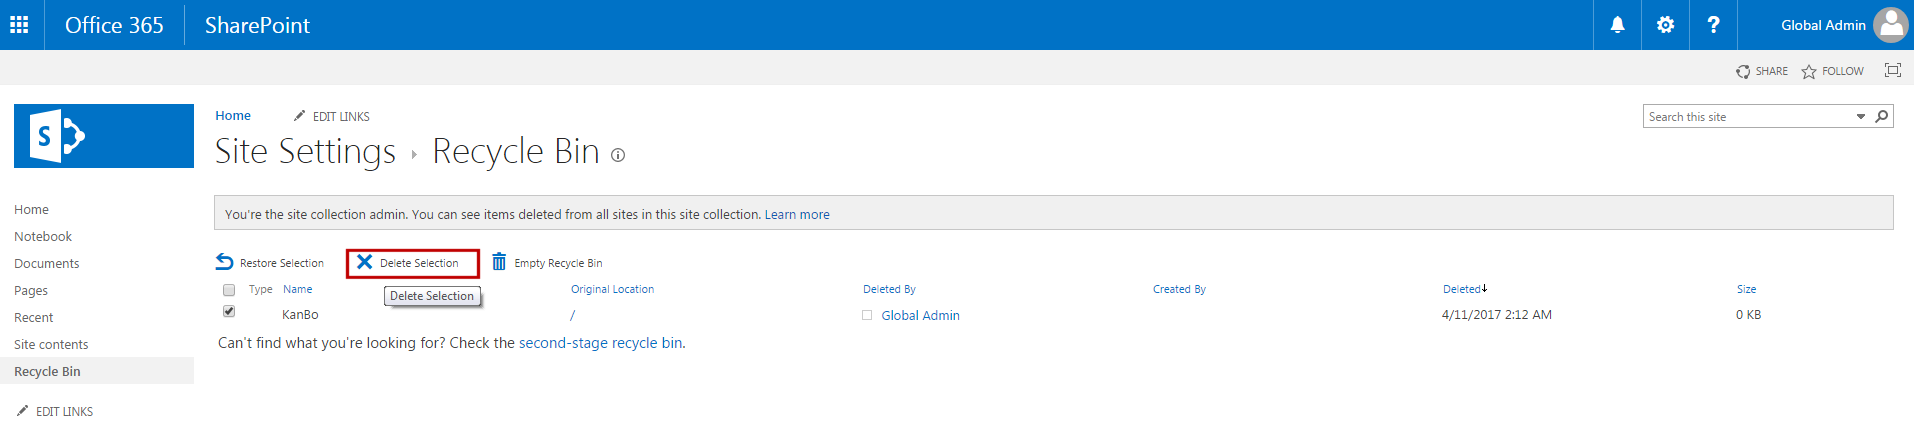
- Go to the Recycle bin. Click on Recycle bin in the left pane or go to Settings -> Recycle bin.
- Select KanBo and click on Delete Selection.
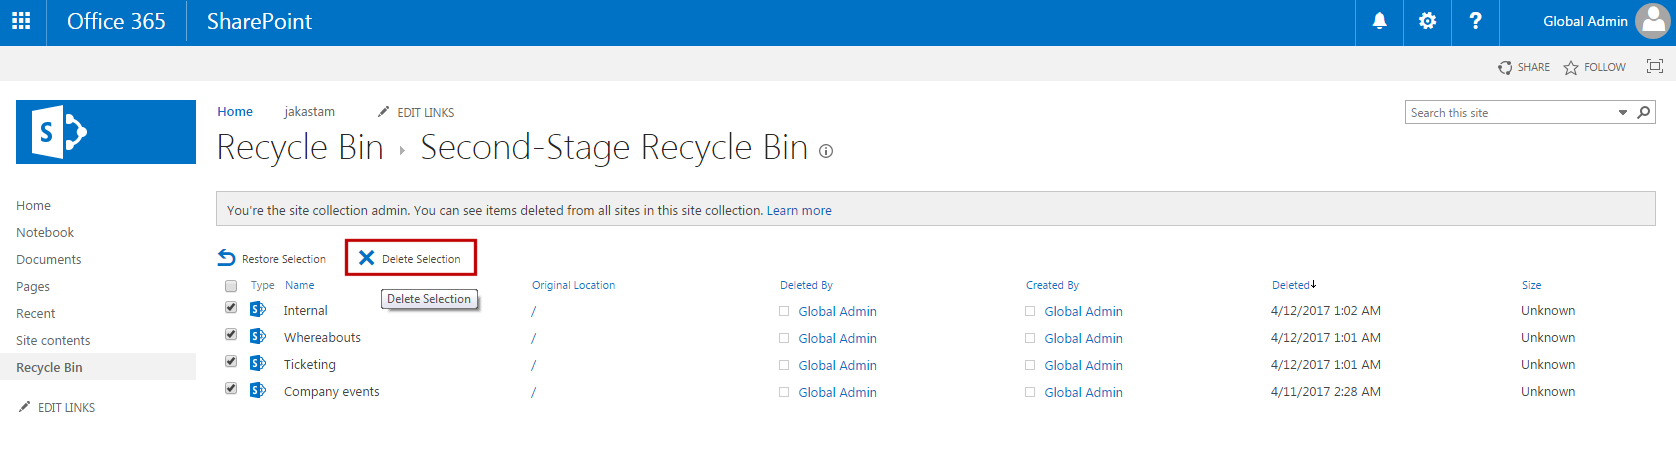
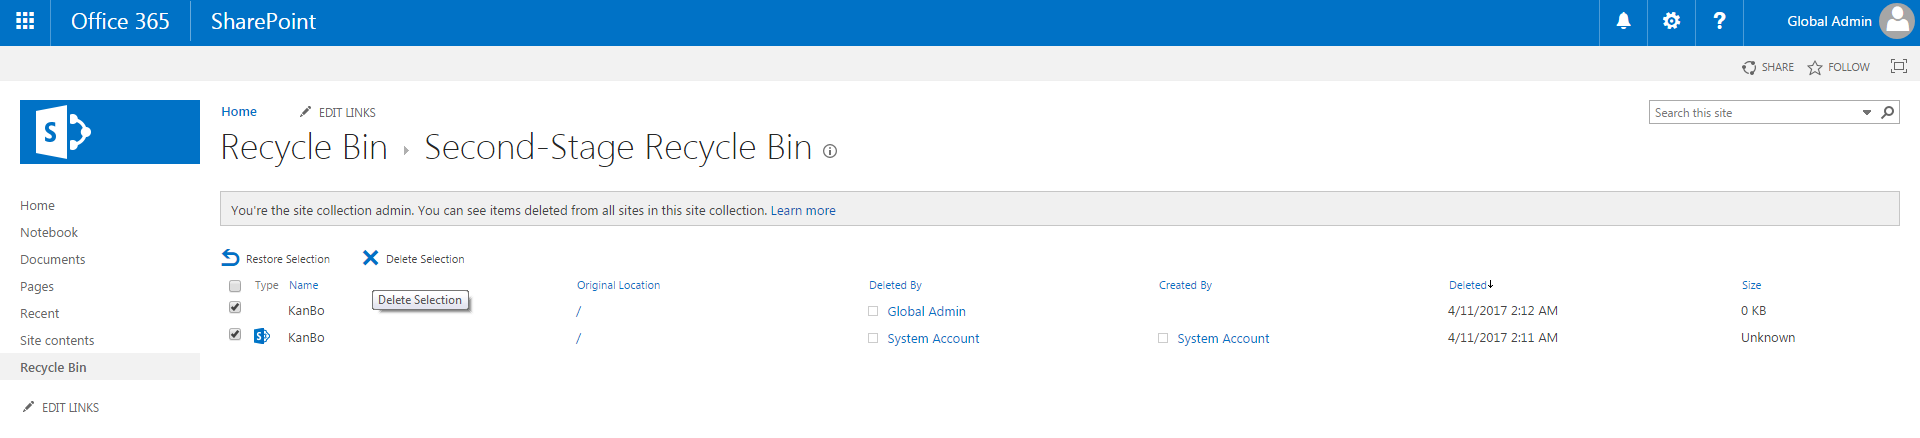
- Now navigate to the Second-stage recycle bin. You can find a link to it in the First-stage Recycle bin page.

- In the Second-stage recycle bin, select both KanBo items once again and click on Delete selection - this time KanBo will be deleted pernamently
3. Delete KanBo Security Groups
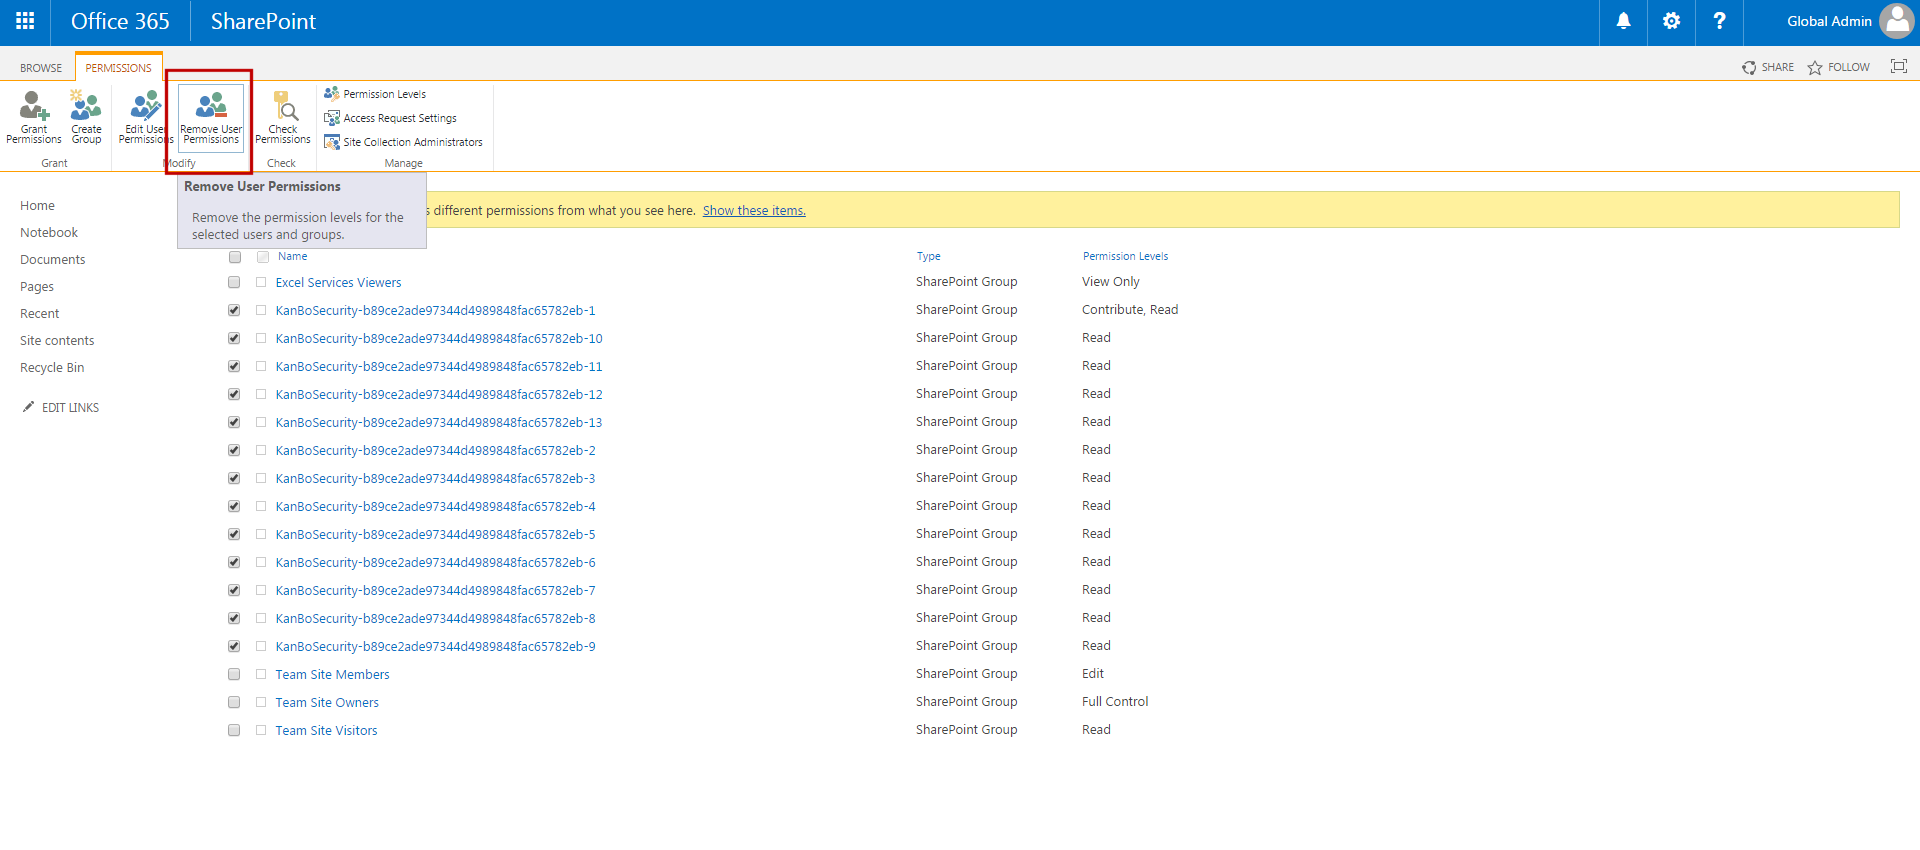
- Go to Settings and choose Site Permissions.
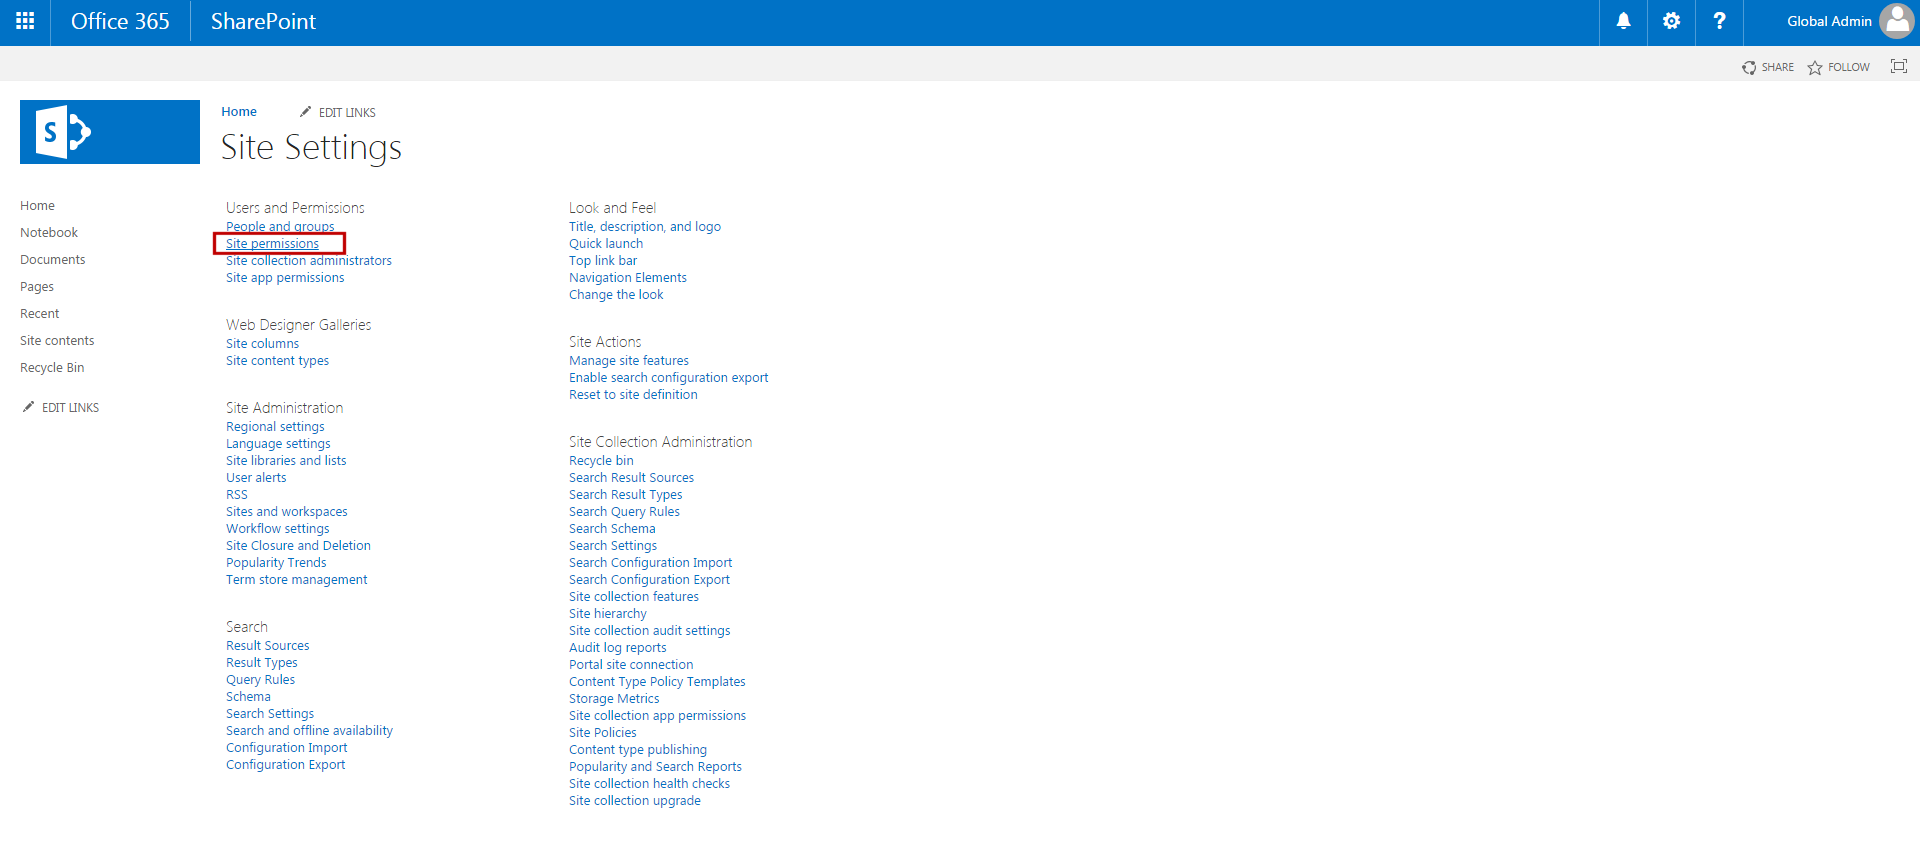
- Select all Groups containing KanBo in their name and click on Remove User Permissions.
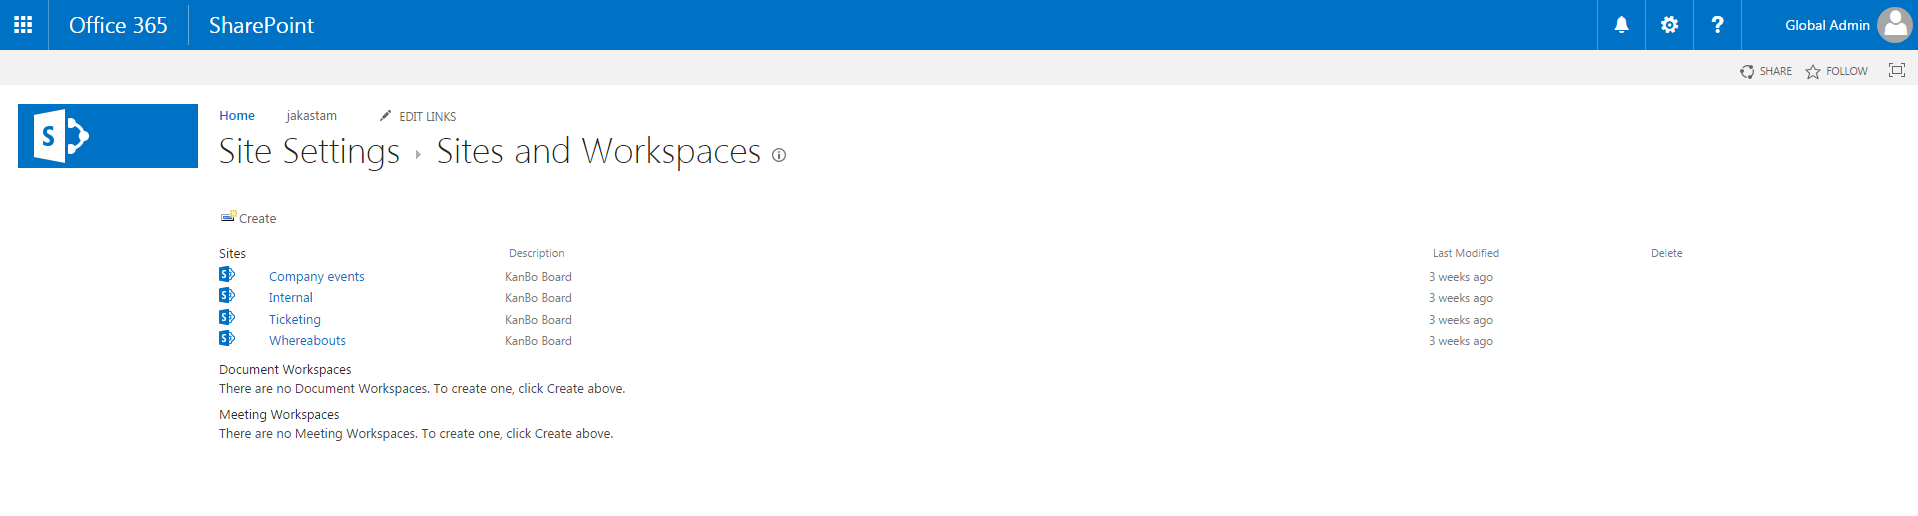
4. Delete KanBo Subsites
When a Board in KanBo is created, a new sub-site in your Site Collection is being created as well. You need to remove them
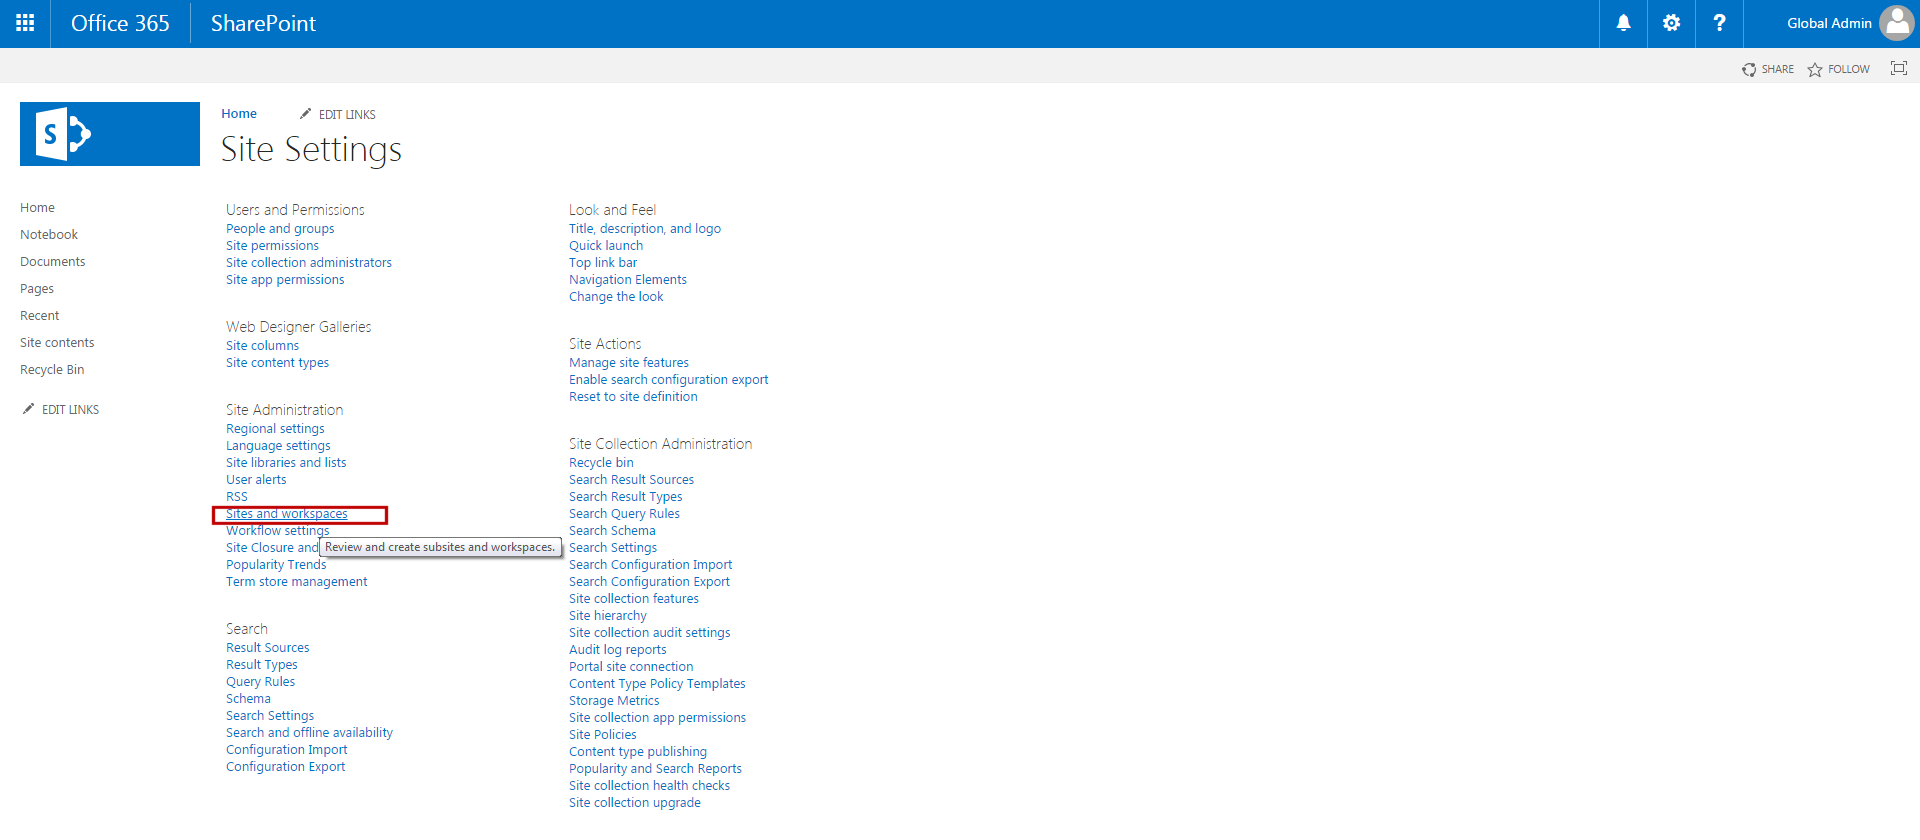
- Go to Site Settings of a Site Collection where KanBo is installed.
- Select Site and Workplaces.
You might see there a list of KanBo sub-sites (named after your Boards in KanBo).
- Enter one of them.
- When you enter one of sub-sites, click on the Gear icon and choose Site Settings.
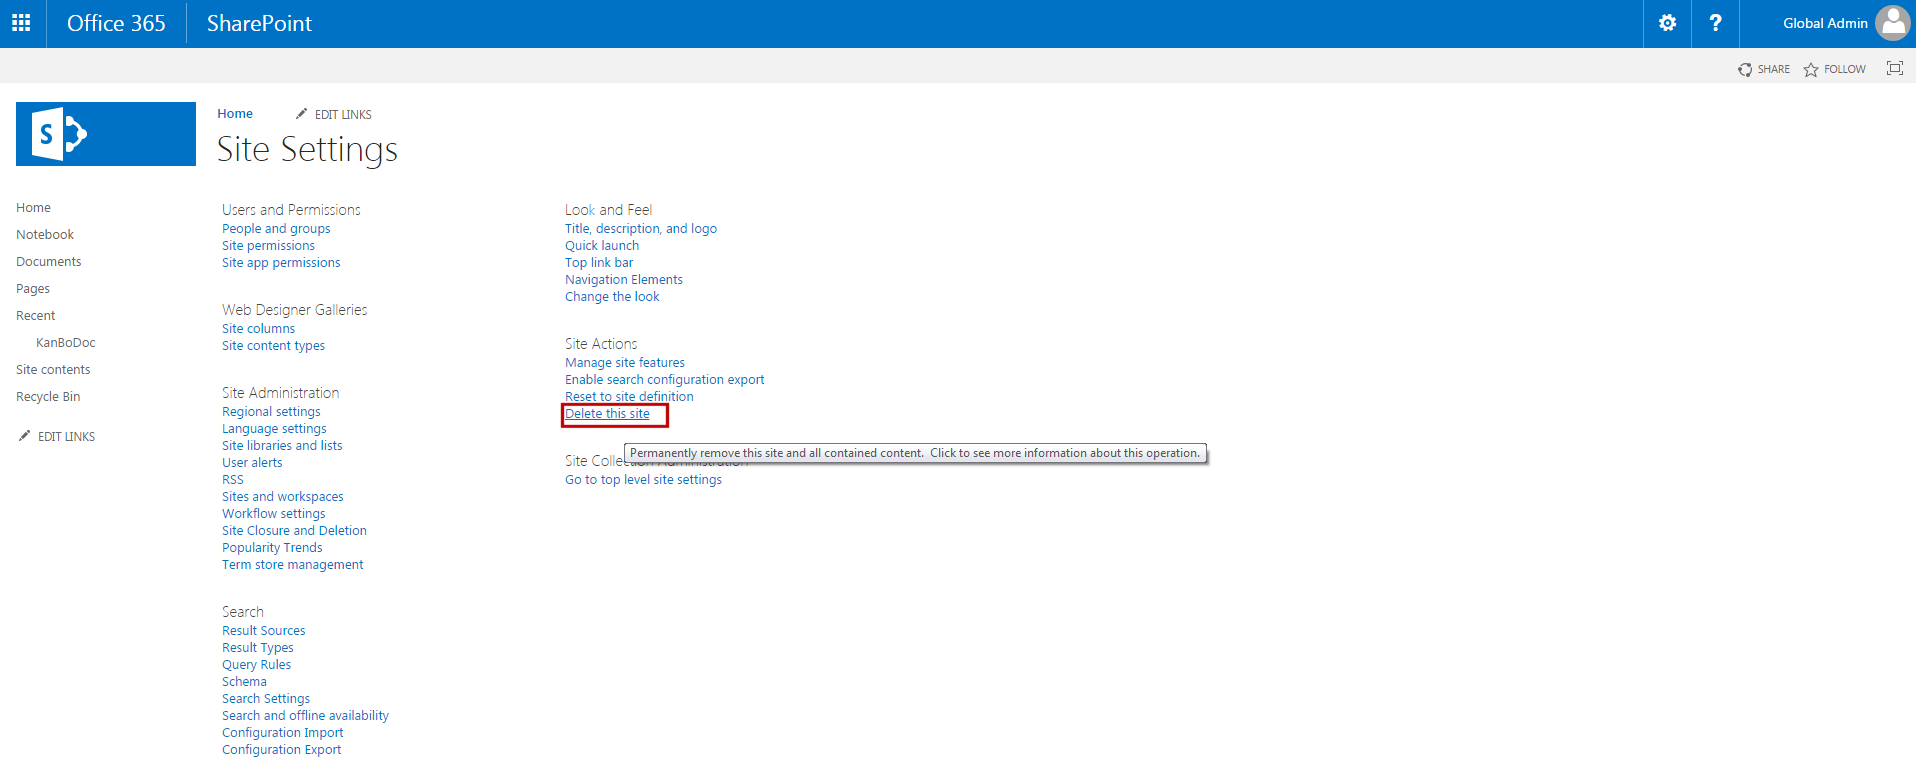
- Confirm this action by clicking Delete.

Please repeat this action for every KanBo sub-site.
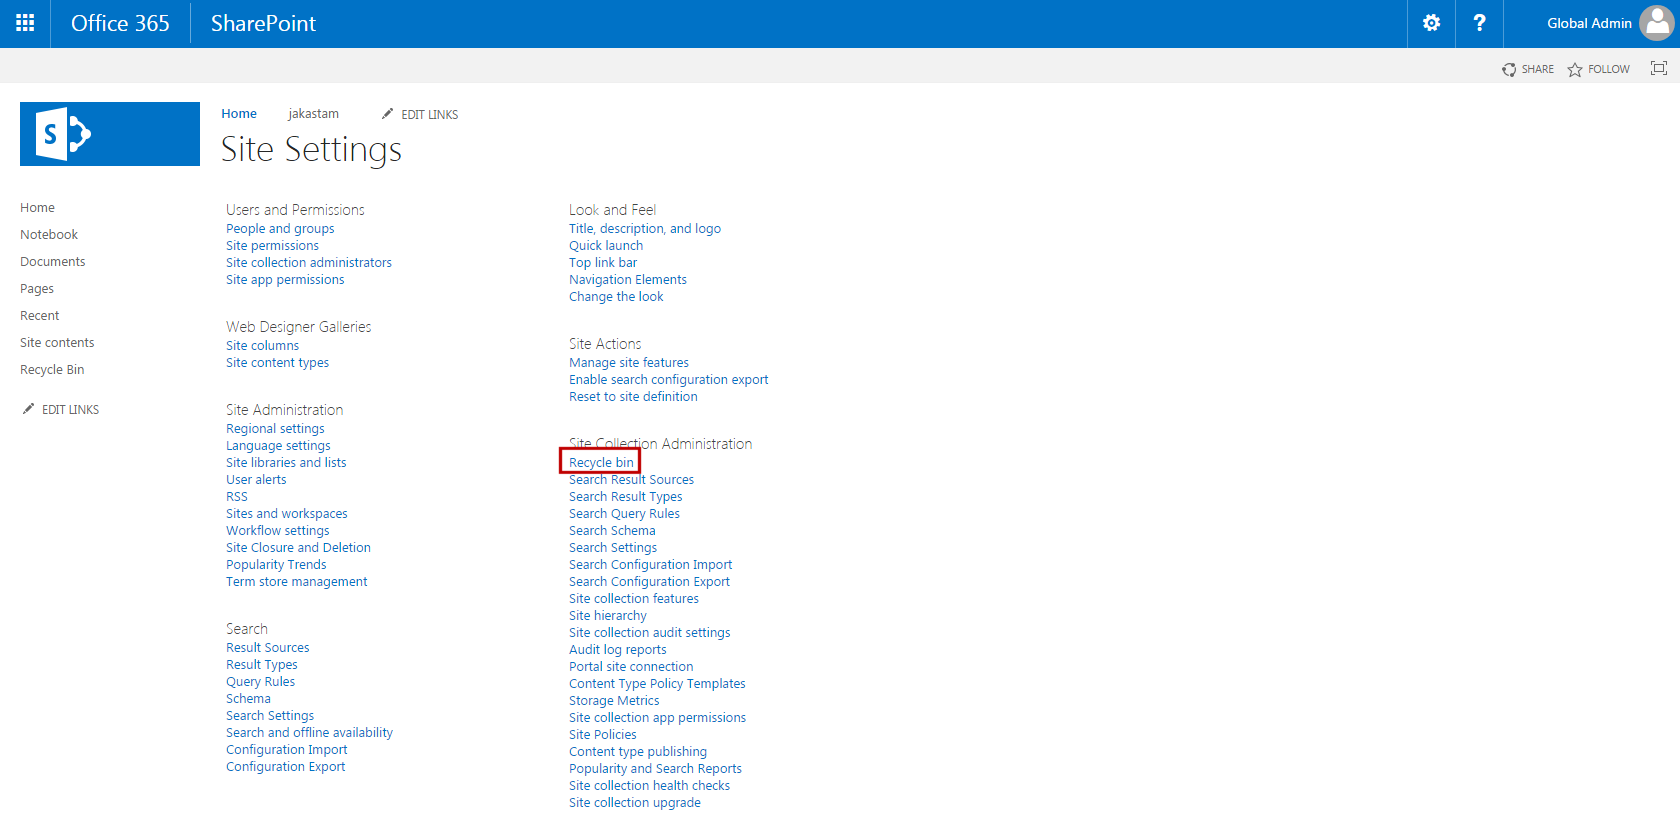
- After deleting all KanBo sub-sites, please navigate to the main Site Collection, where you have previously added KanBo.
- Enter Settings -> Recycle bin.
- After navigating to Recyle bin, enter Second-stage recycle bin.
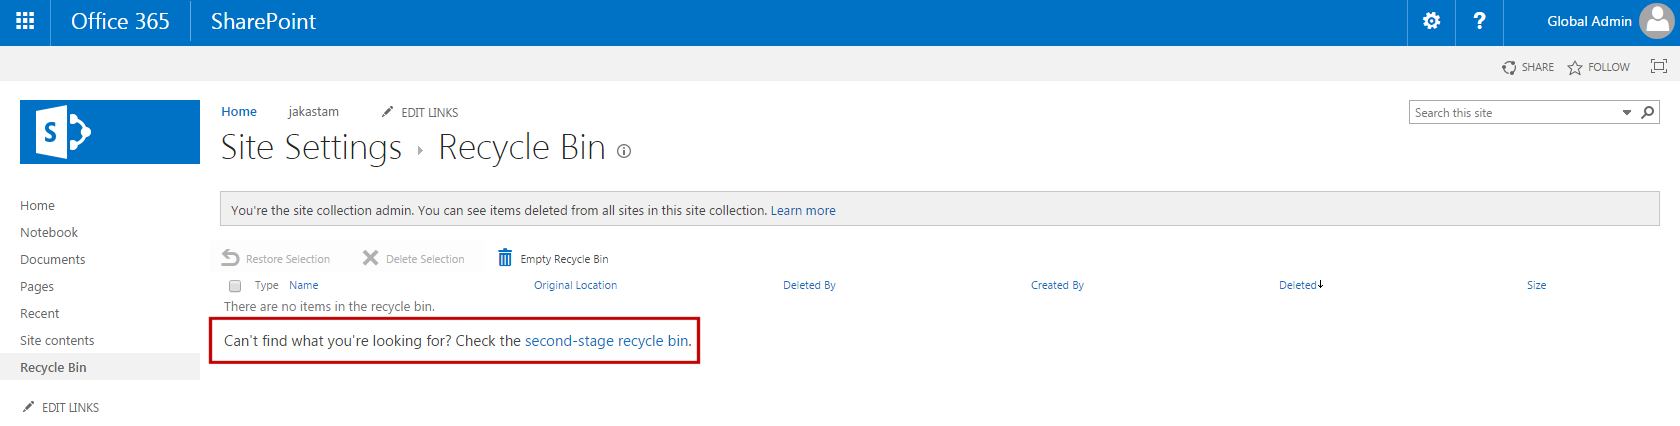
- Select all sub-sites and click on"Delete selection".